Traveling with a WIP Quilt

Are you a quilter who can't bear to leave your beloved work-in-progress (WIP) quilt behind when you travel? We've got a fantastic tip for you to ensure that your quilt remains clean, undamaged, and easy to work on while on the go. Plus, if you're wondering what crafting tools are allowed on a plane, we've got you covered with TSA-approved craft notions. Let's dive into the world of travel-ready quilting and crafting!
Scroll to the end for the traveling video tutorials.

Tip 1: Prepare Raw Edges
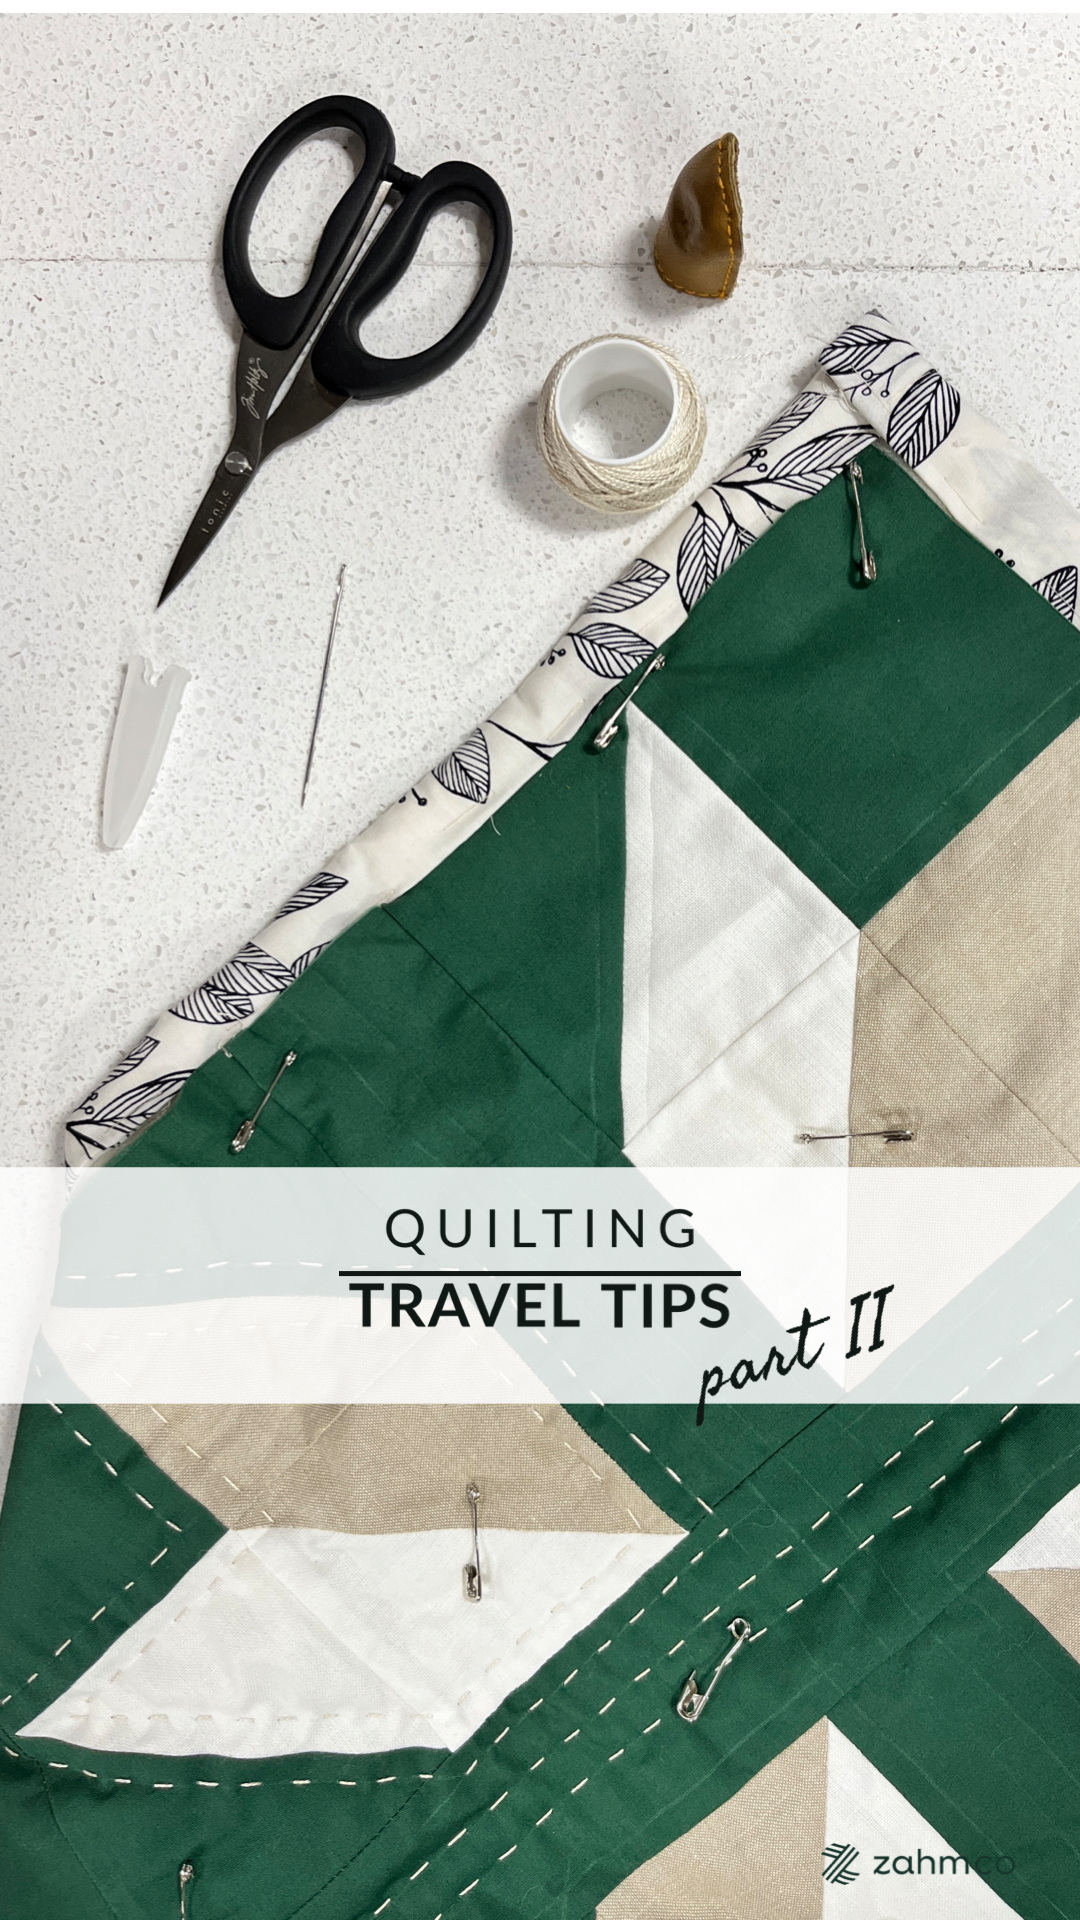
One of the key challenges of traveling with a WIP quilt is keeping it clean and easily manageable. To address this, we have a game-changing tip for you: thread baste the raw edge of your quilt. Thread basting is a simple and effective technique that involves using a hand-sewn running stitch to temporarily secure the layers of your quilt together. Here's how it works:
Prepare your quilt sandwich by layering your quilt top, batting, and backing fabric as usual.
Thread a hand-sewing needle with a contrasting thread (so it's easy to remove later) and create large, evenly spaced stitches along the raw edges of your quilt.
These stitches will hold the layers in place without leaving any permanent marks, making it easy to move your quilt around and preventing it from getting dirty or wrinkled during your travels.
When you're ready to resume working on your quilt, simply remove the basting stitches.
Thread basting the raw edge is a small investment of time (typically about 20 minutes for a lap-size quilt) that pays off with a clean and easy workspace wherever your travels take you. It's a tip that every quilter should have in their toolbox!
Tip 2: Easy to Carry
Watch the Instagram Traveling Part II video for a visual.
I folded the quilt where the backing showed, then rolled it.
Took an old selvage strip, tied it through the rolled quilt, and wore it over my shoulder.
This method allowed me to be hands-free but also kept out of my suitcase.
Tip 3: Approved Carry-On Craft Notions
Now that you have your WIP quilt prepped for travel, you might wonder which crafting tools and notions you can bring on a plane. We did some research to help you navigate the world of TSA-approved craft items, and here's what we found:
Crochet Hooks: You can bring your crochet hooks with you on your flight.
Knitting Needles: Don't leave your knitting needles behind; they're allowed in your carry-on baggage.
Safety Pins: Good news for quilters – safety pins are also TSA-approved.
Scissors: Small scissors with blades less than 4 inches from the pivot point are allowed. So, those little snips you use for quilting should be just fine.
Sewing Needles: Keep your sewing project going by bringing your sewing needles in your carry-on bag.
Traveling with a Quilt and Craft Notions
To put these findings to the test, I traveled within the United States with a lap-size quilt top with over 100 safety pins holding the layers together. We're happy to report that we had no issues with any of the items mentioned above – the crochet hooks, knitting needles, safety pins, and scissors all sailed smoothly through TSA security.
Remember that these regulations are based on information we found on tsa.gov and our personal experience within the United States. If you're traveling internationally or have any specific questions, it's always a good idea to double-check with the relevant authorities or airlines for the most up-to-date information.
Traveling Video Tutorials
Click to watch the Instagram reels for video instruction.

Demonstrates how I thread-basted the edges
Demonstrates how I carry it hands-free and all the supplies I brought.

Hello!
I’m Katie the designer and maker behind Zahm Co. Thank you for being here, I hope you find this blog helpful. For blog notifications, subscribe below!
Click the image to learn more about me.
xx