Join Binding Ends

There are multiple ways to connect the last two strips of the binding. I was taught this technique in high school, and funny enough, it’s stayed with me all this time. My goal is to give you the right tips to learn and remember forever. Let’s jump in!
A video demonstration is a part of this blog; scroll below to find the link.
Supplies Needed:
Quilt with binding on but not finished
Scissors
Sewing Machine
How-To: Join Binding Ends
Time Spent: 3 - 5 minutes
Pre-requisite: Place your binding on the quilt leaving a 10" - 12" open gap.
I recommend watching the video for detailed instructions. Short on time? I love watching YouTube videos at increased playback speed (under settings) to save time.
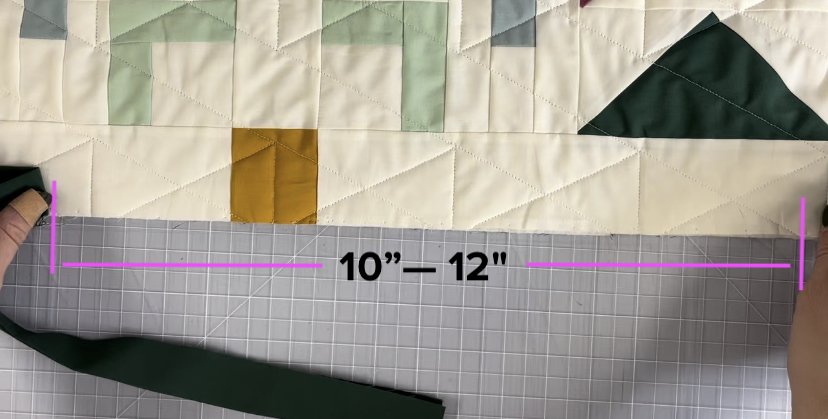
1. Leave about 10" - 12" gap from where the binding started.
Cut off the left strip to lay in the center of the gap.
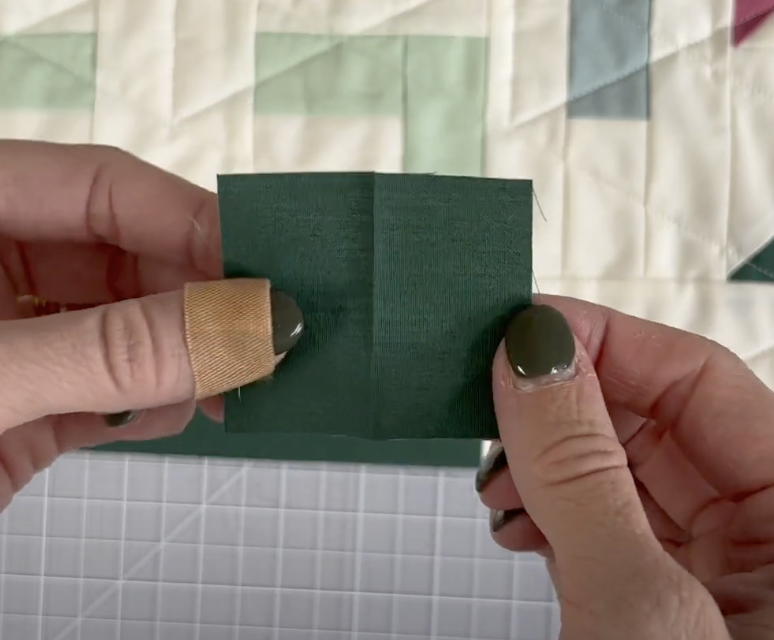
2. Cut a small piece off the binding, open it, and set it aside.
This will be used as a measuring tool.

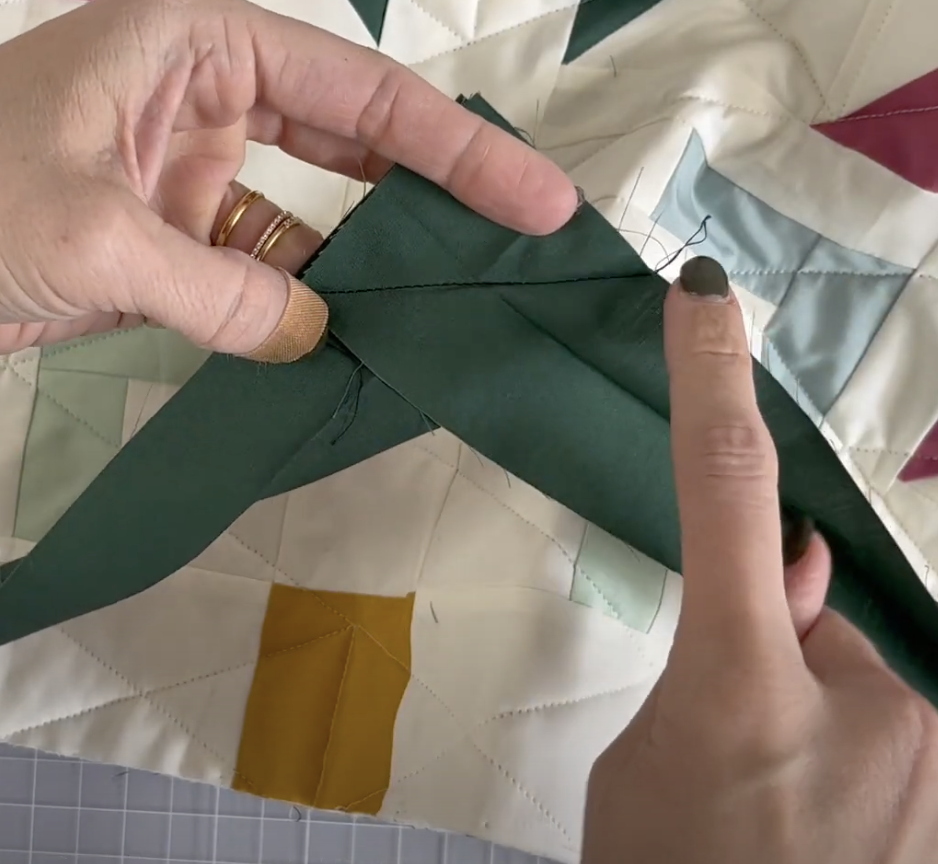
3. Lay out the strips. Bring the right strip over the left strip.

4. Place the measuring tool on top of the two strips, align the right side of the tool with the right side of the left strip. Cut the right strip measuring it against the left side of the tool.

5. On the right strip fold down your top corner piece so it aligns with the bottom of the strip making a 90-degree angle. Press down.
Push down on the fold to make a good crease as this will be used as our sewing line later.

6. Open left strip, place on top of right strips where right sides are together.
When you flip up the strips they will make an “A” shape, this is how you know you’re ready for the next step. Watch the video at minute 1:23 for a visual.
7. Sew along the creased line.
Trim and press open.

8. Ta-da! Now you have a finished binding that lays perfectly flat on your quilt!
Lay binding flat, take to your machine, and finish sewing binding to quilt.

Hello!
I’m Katie the designer and maker behind Zahm Co. Thank you for being here, I hope you find this blog helpful. For blog notifications, subscribe below!
Click the image to learn more about me.
xx