Mastering Flying Geese
The Flying Geese blocks are my favorite so surprise surprise my first pattern, Artwork Quilt has all Flying Geese. The fun part about Artwork Quilt is the size of Flying Geese, I needed a break from tiny pieces so think big here. Artwork Quilt will release next week so let's get pumped up and ready. After reading I hope you walk away with a few tips and tricks and maybe even come to like them as much as I do.
If you are newer to Flying Geese there are a few different methods to create them. The Basic Flying Geese will produce one geese at a time or the No Waste Flying Geese Method will produce four geese at a time.
For this blog I will be diving into the No Waste Method plus sharing a few different tips and tricks to use depending on the quilt pattern you are following. Grab some scrap fabrics and let's do this.
Supplies to make Flying Geese:
One scrap -
Cut into 1 - 13 ½” (square A)One scrap -
Cut into 4 - 7” (square B)Sewing Machine
Rotary Cutter
Rotary Mat
Ruler
Pins
Iron
Ironing Mat
No Waste Flying Geese
4-at-a-time
1. On the wrong side of both B fabrics mark a diagonal line.
Pro tip: Use your favorite tool, I’m using my Hera Marker.
2. Laying fabric A right side up, place fabric B right side down on opposite corners.
Pro tip: Fabric B should overlap in the center.
3. Sew a ¼” seam on each side of the marked line.
4. Using your rotary cutter to cut on the marked line.
Now you have 2 units.
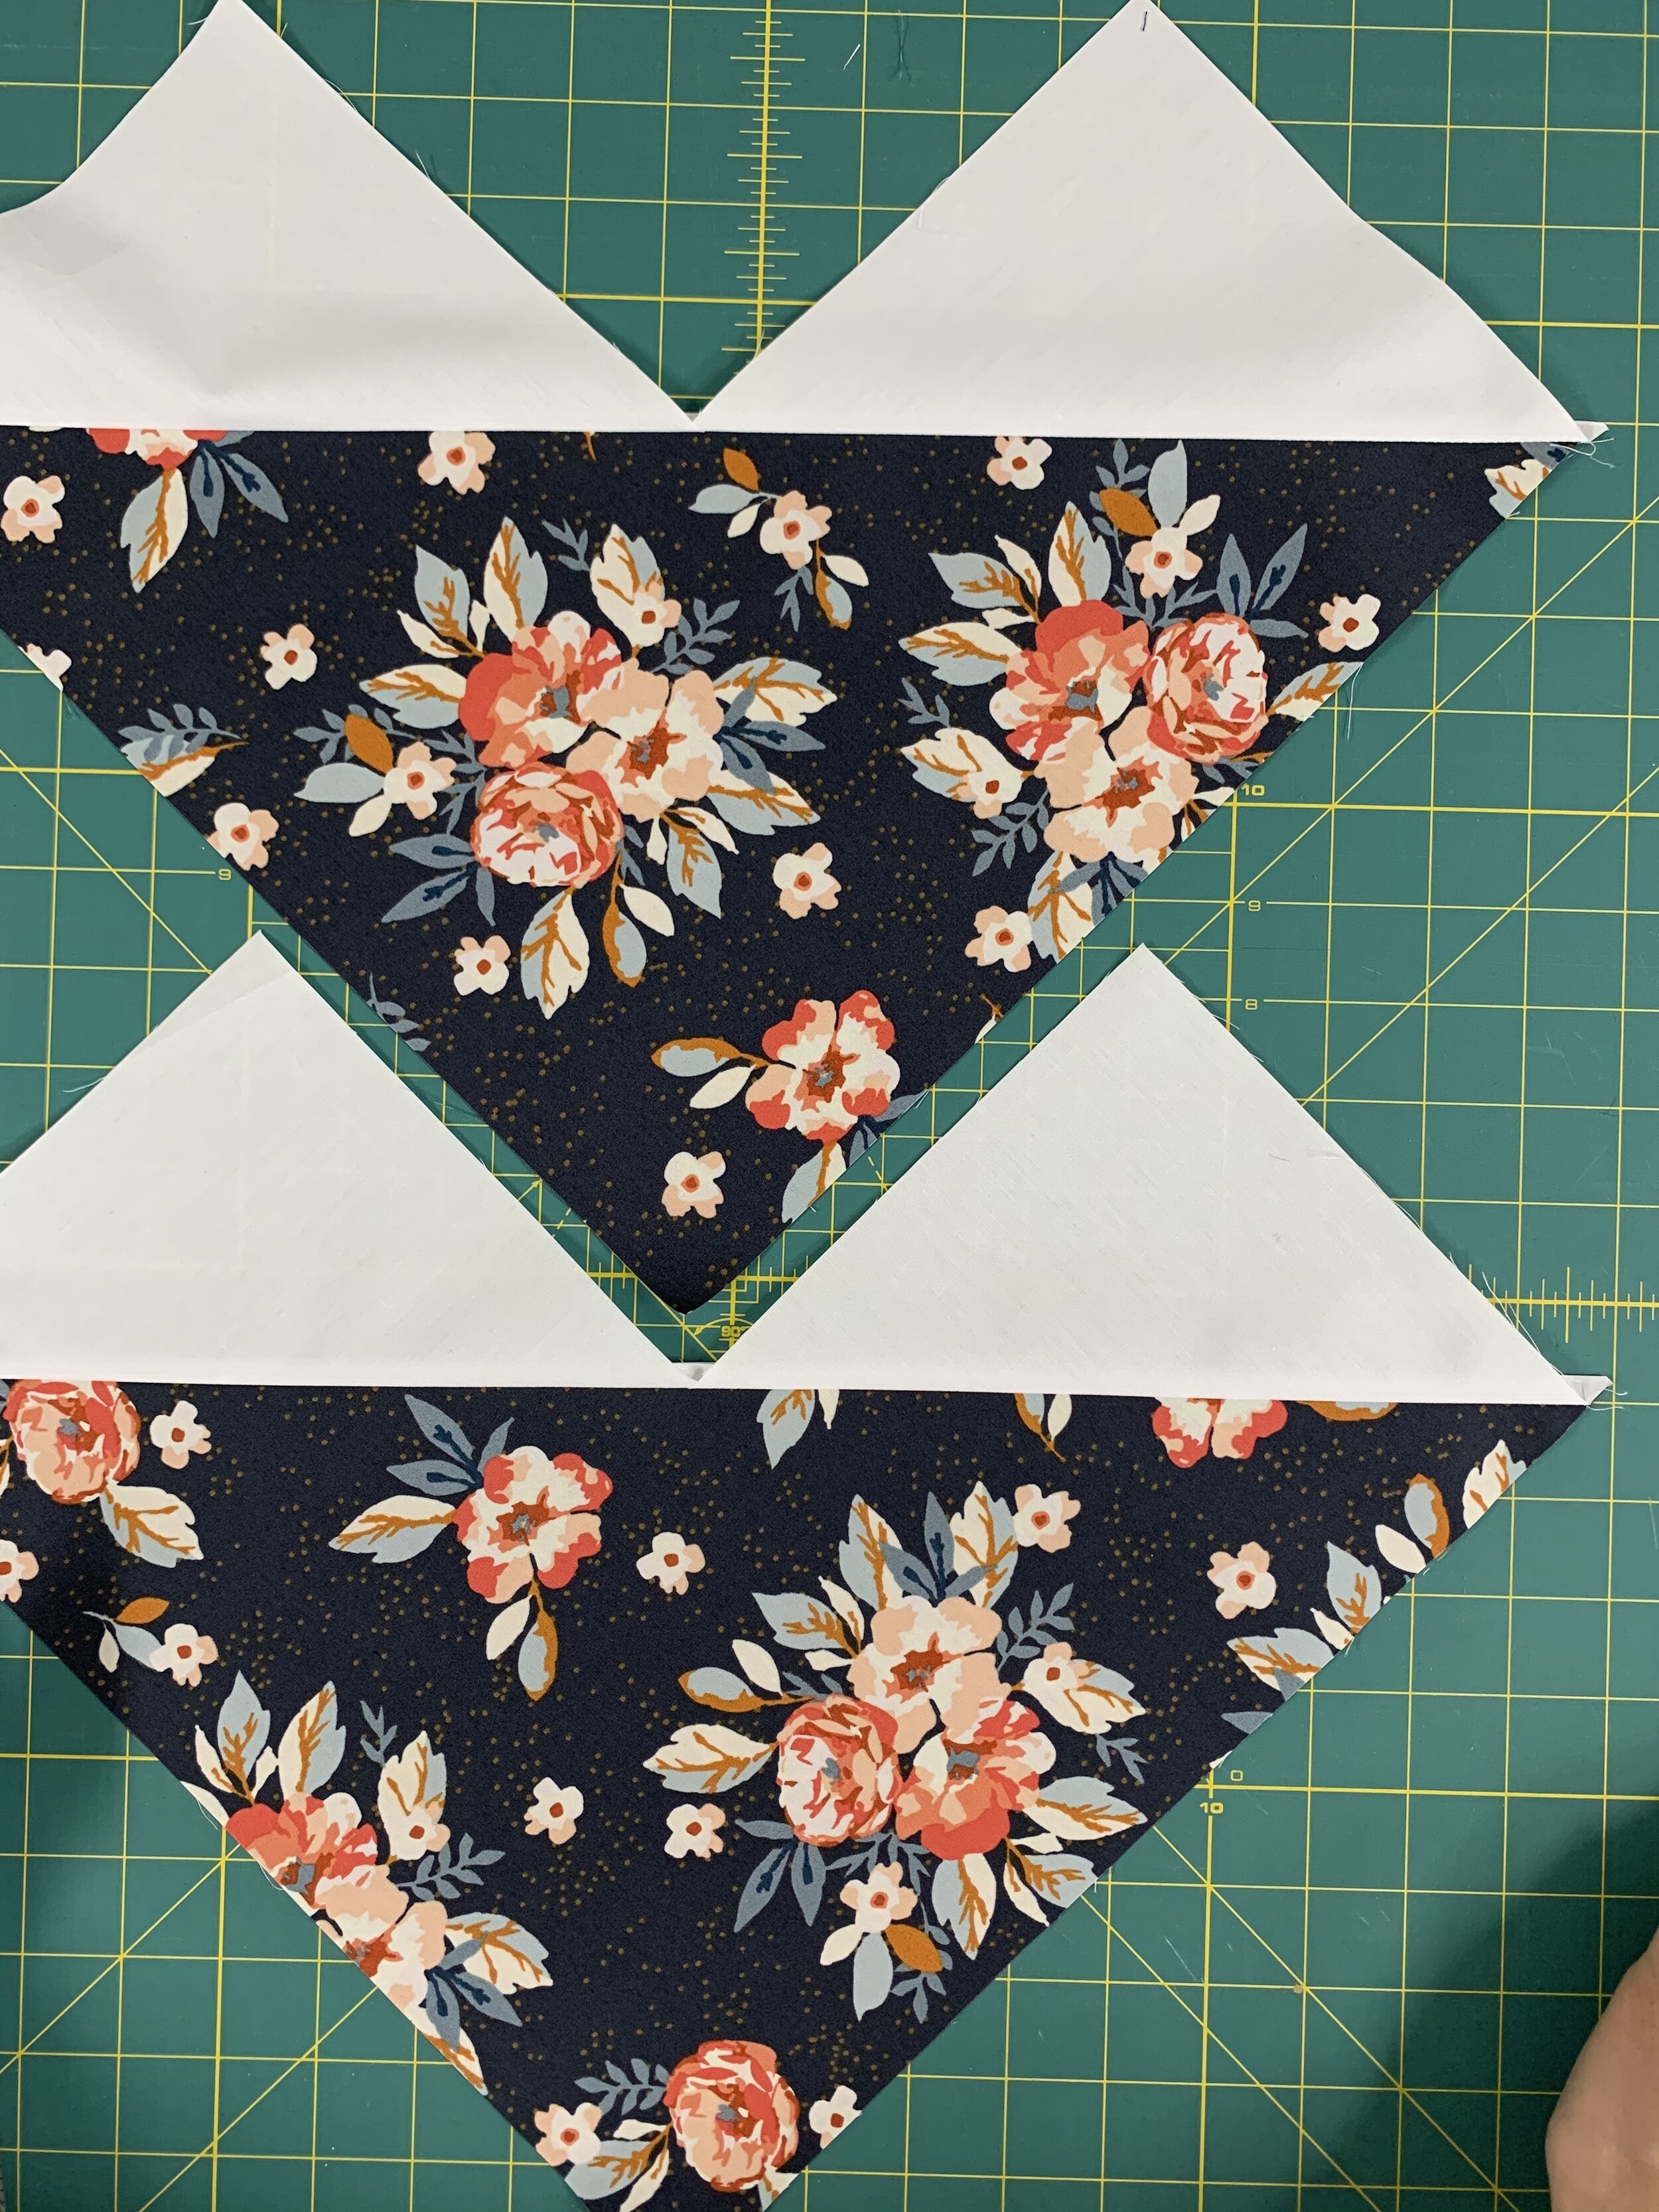
5. Flip corner up and press.
These heart shapes are a sign you’re halfway there!

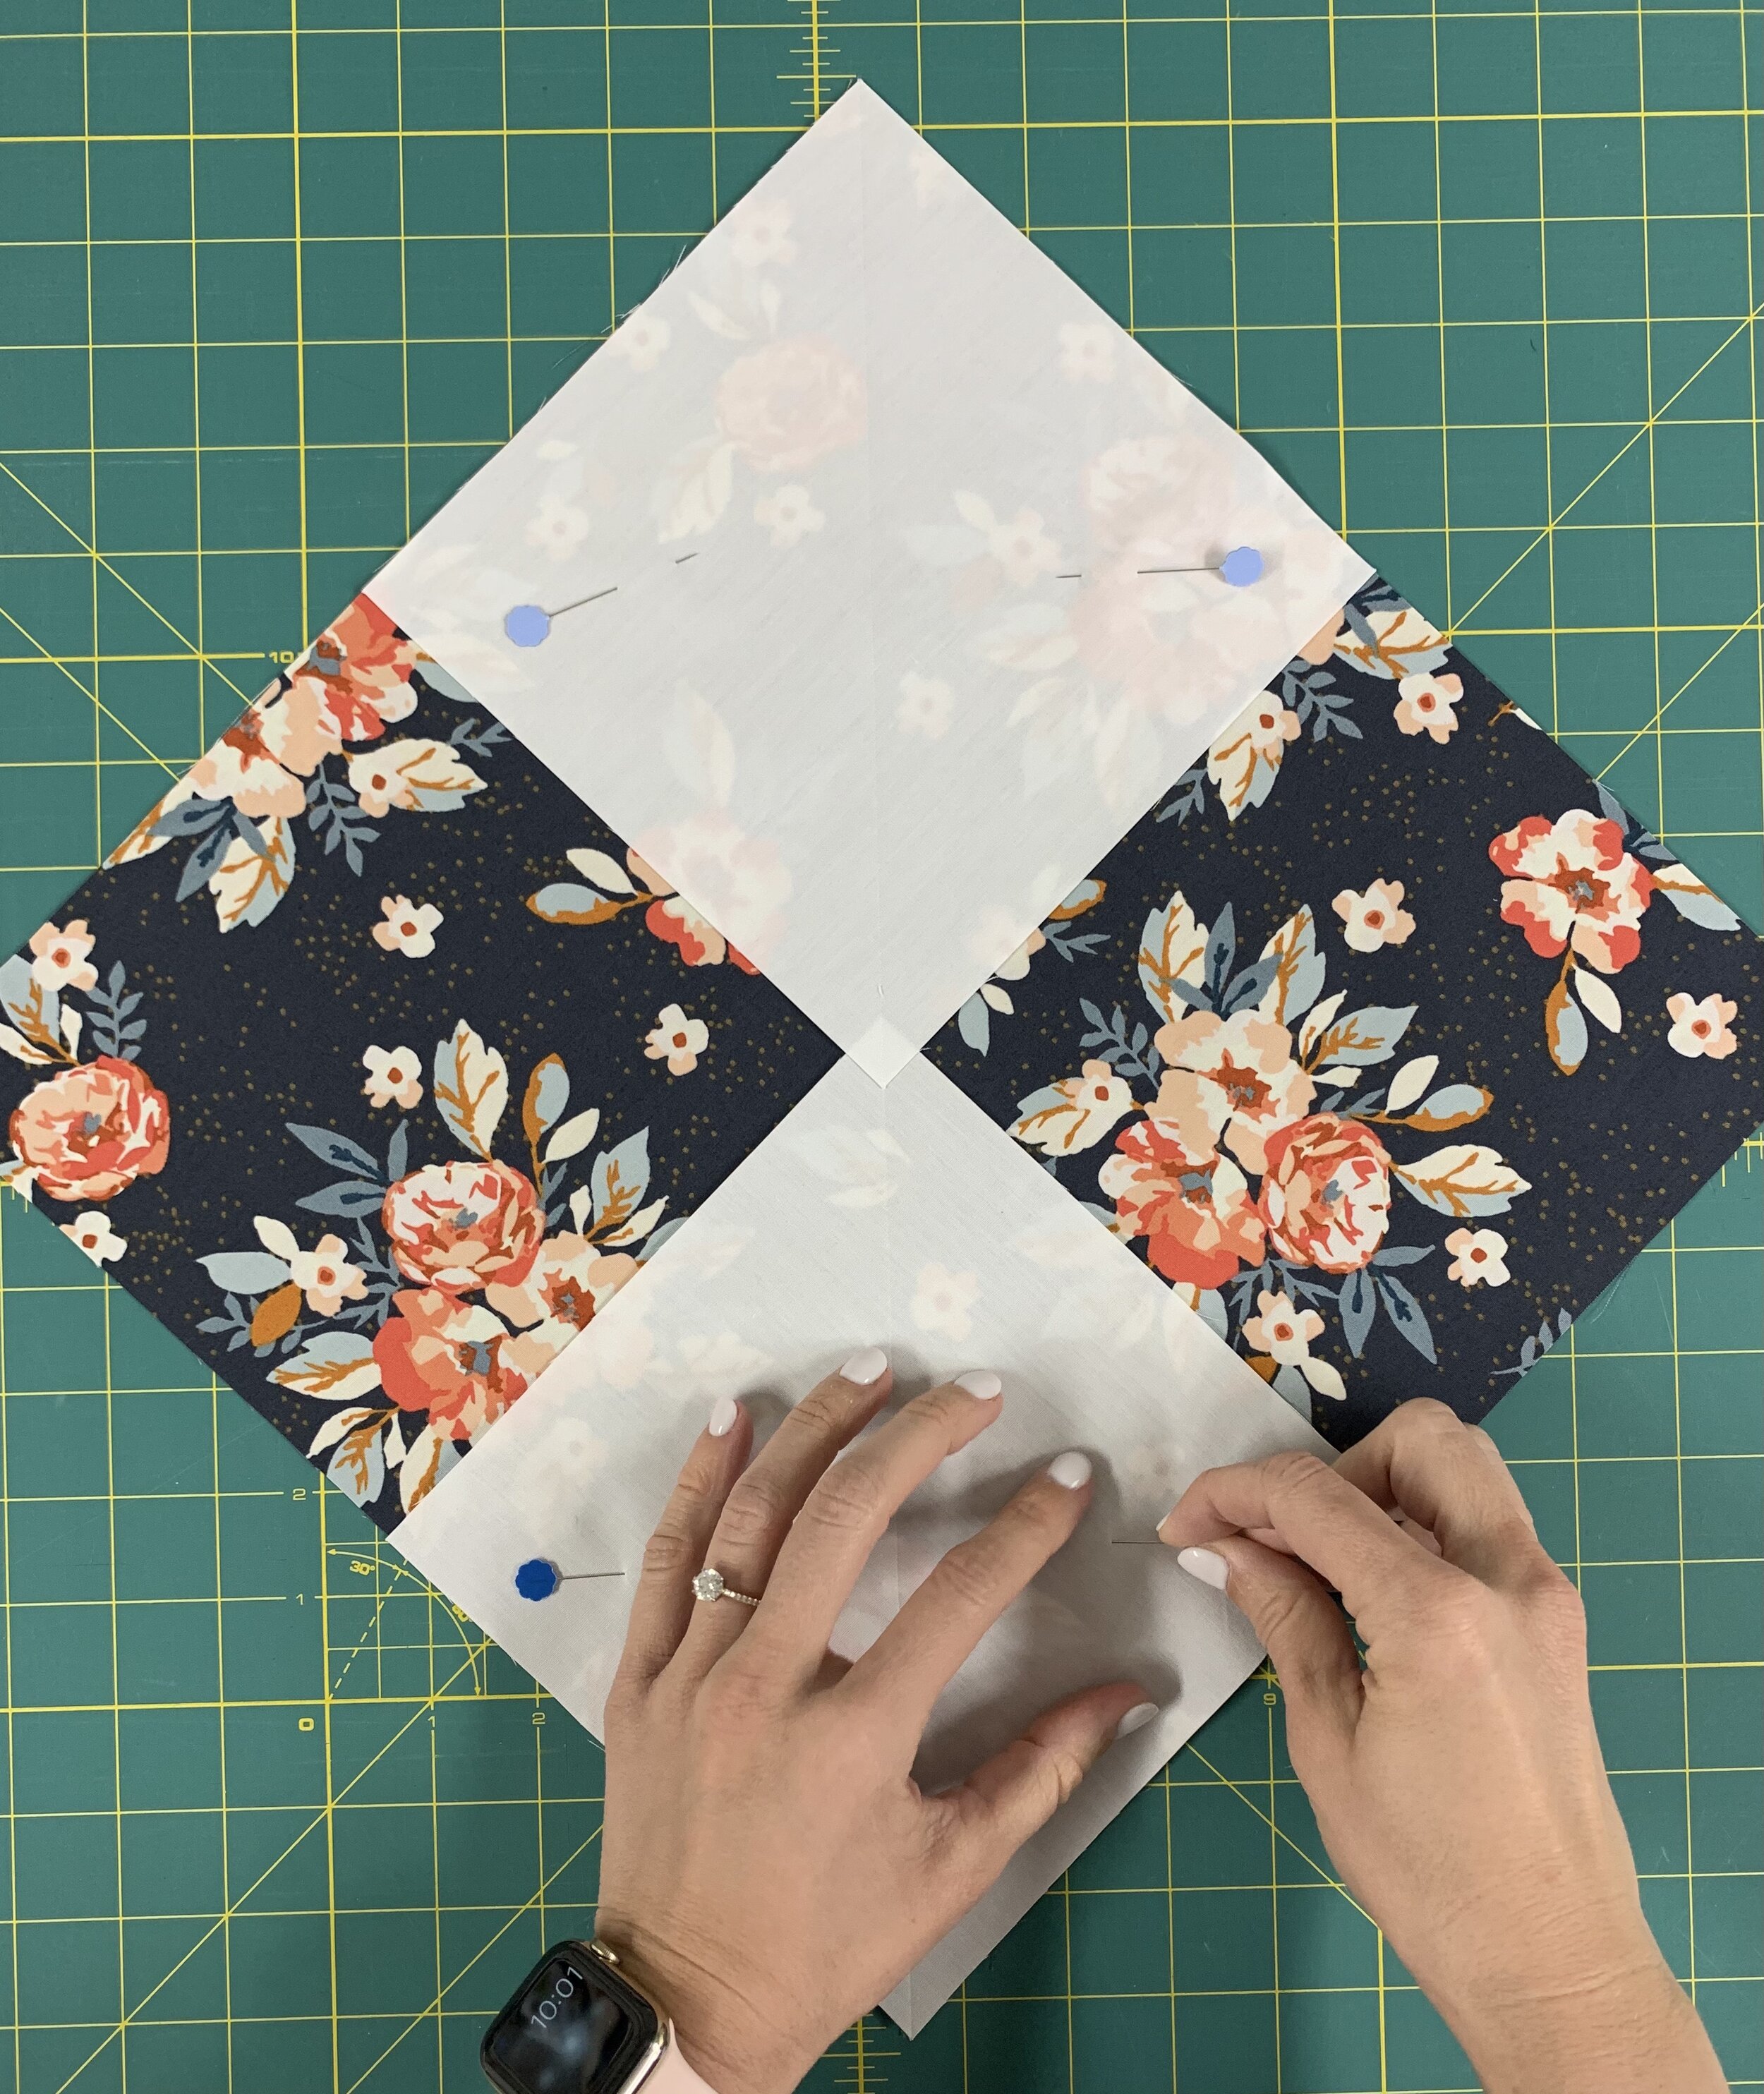
6. Place a fabric B on the untouched corner of each unit, right side together and pin.
Repeat with the other unit.
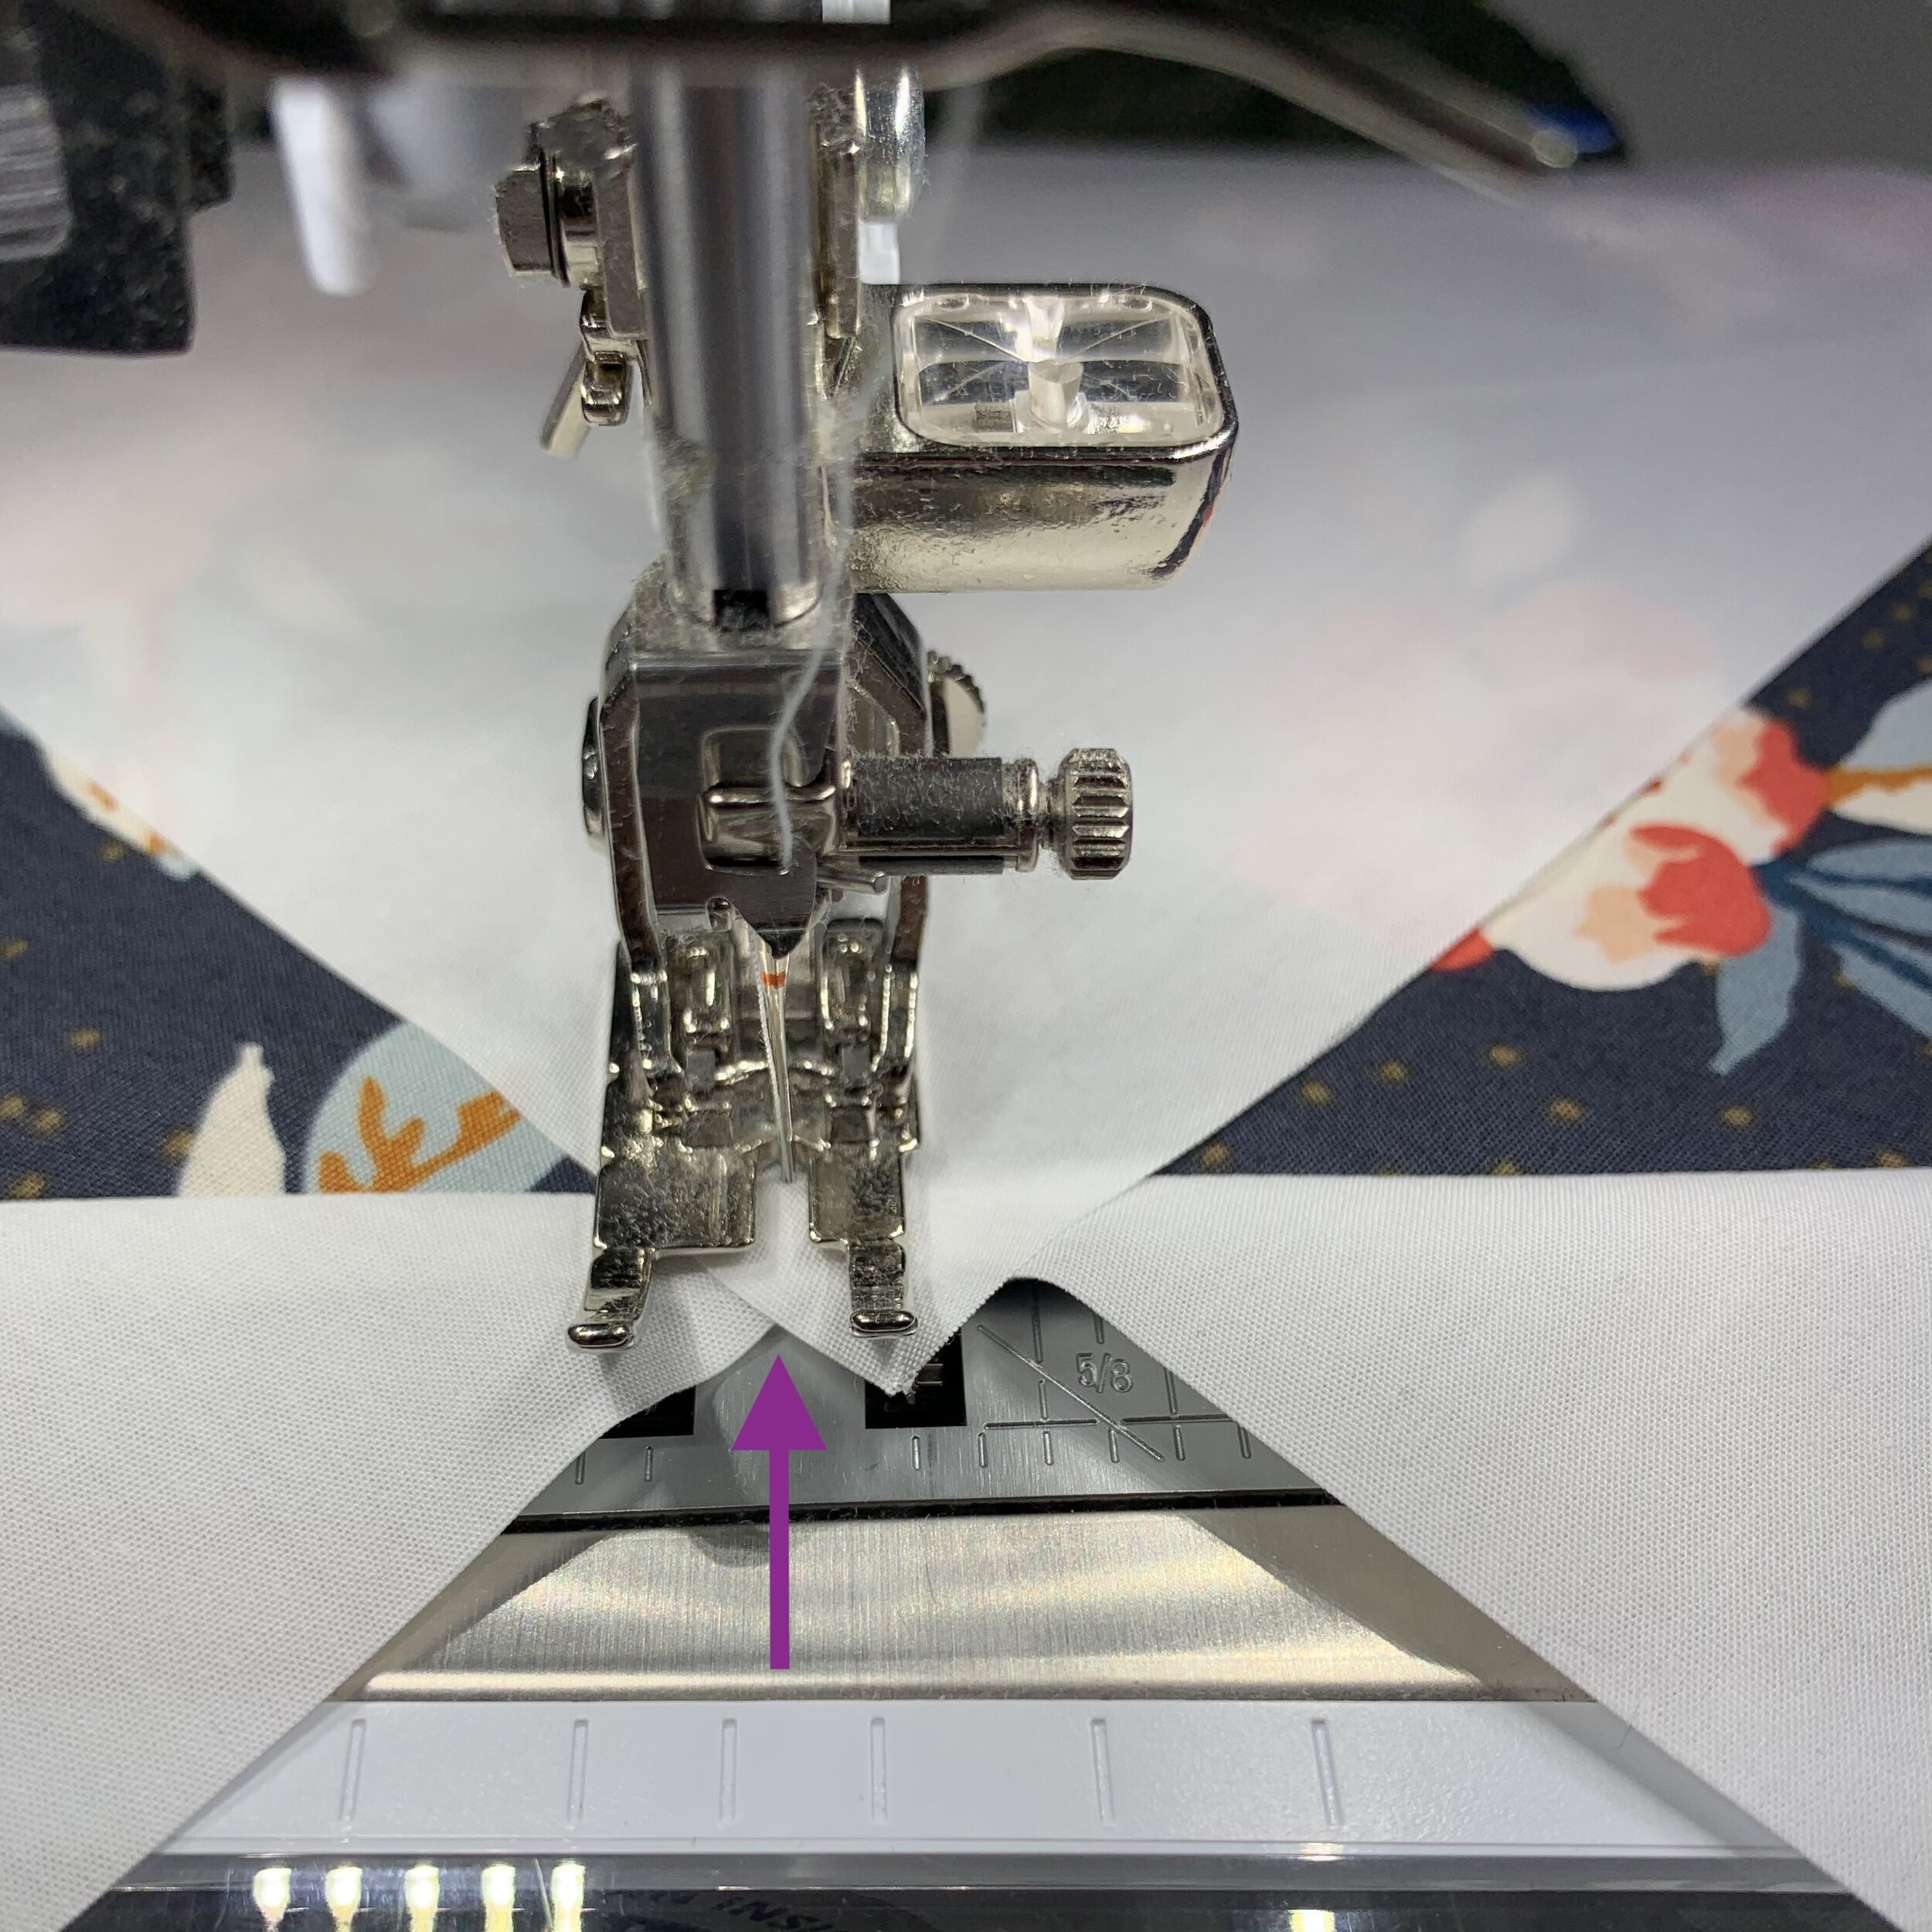
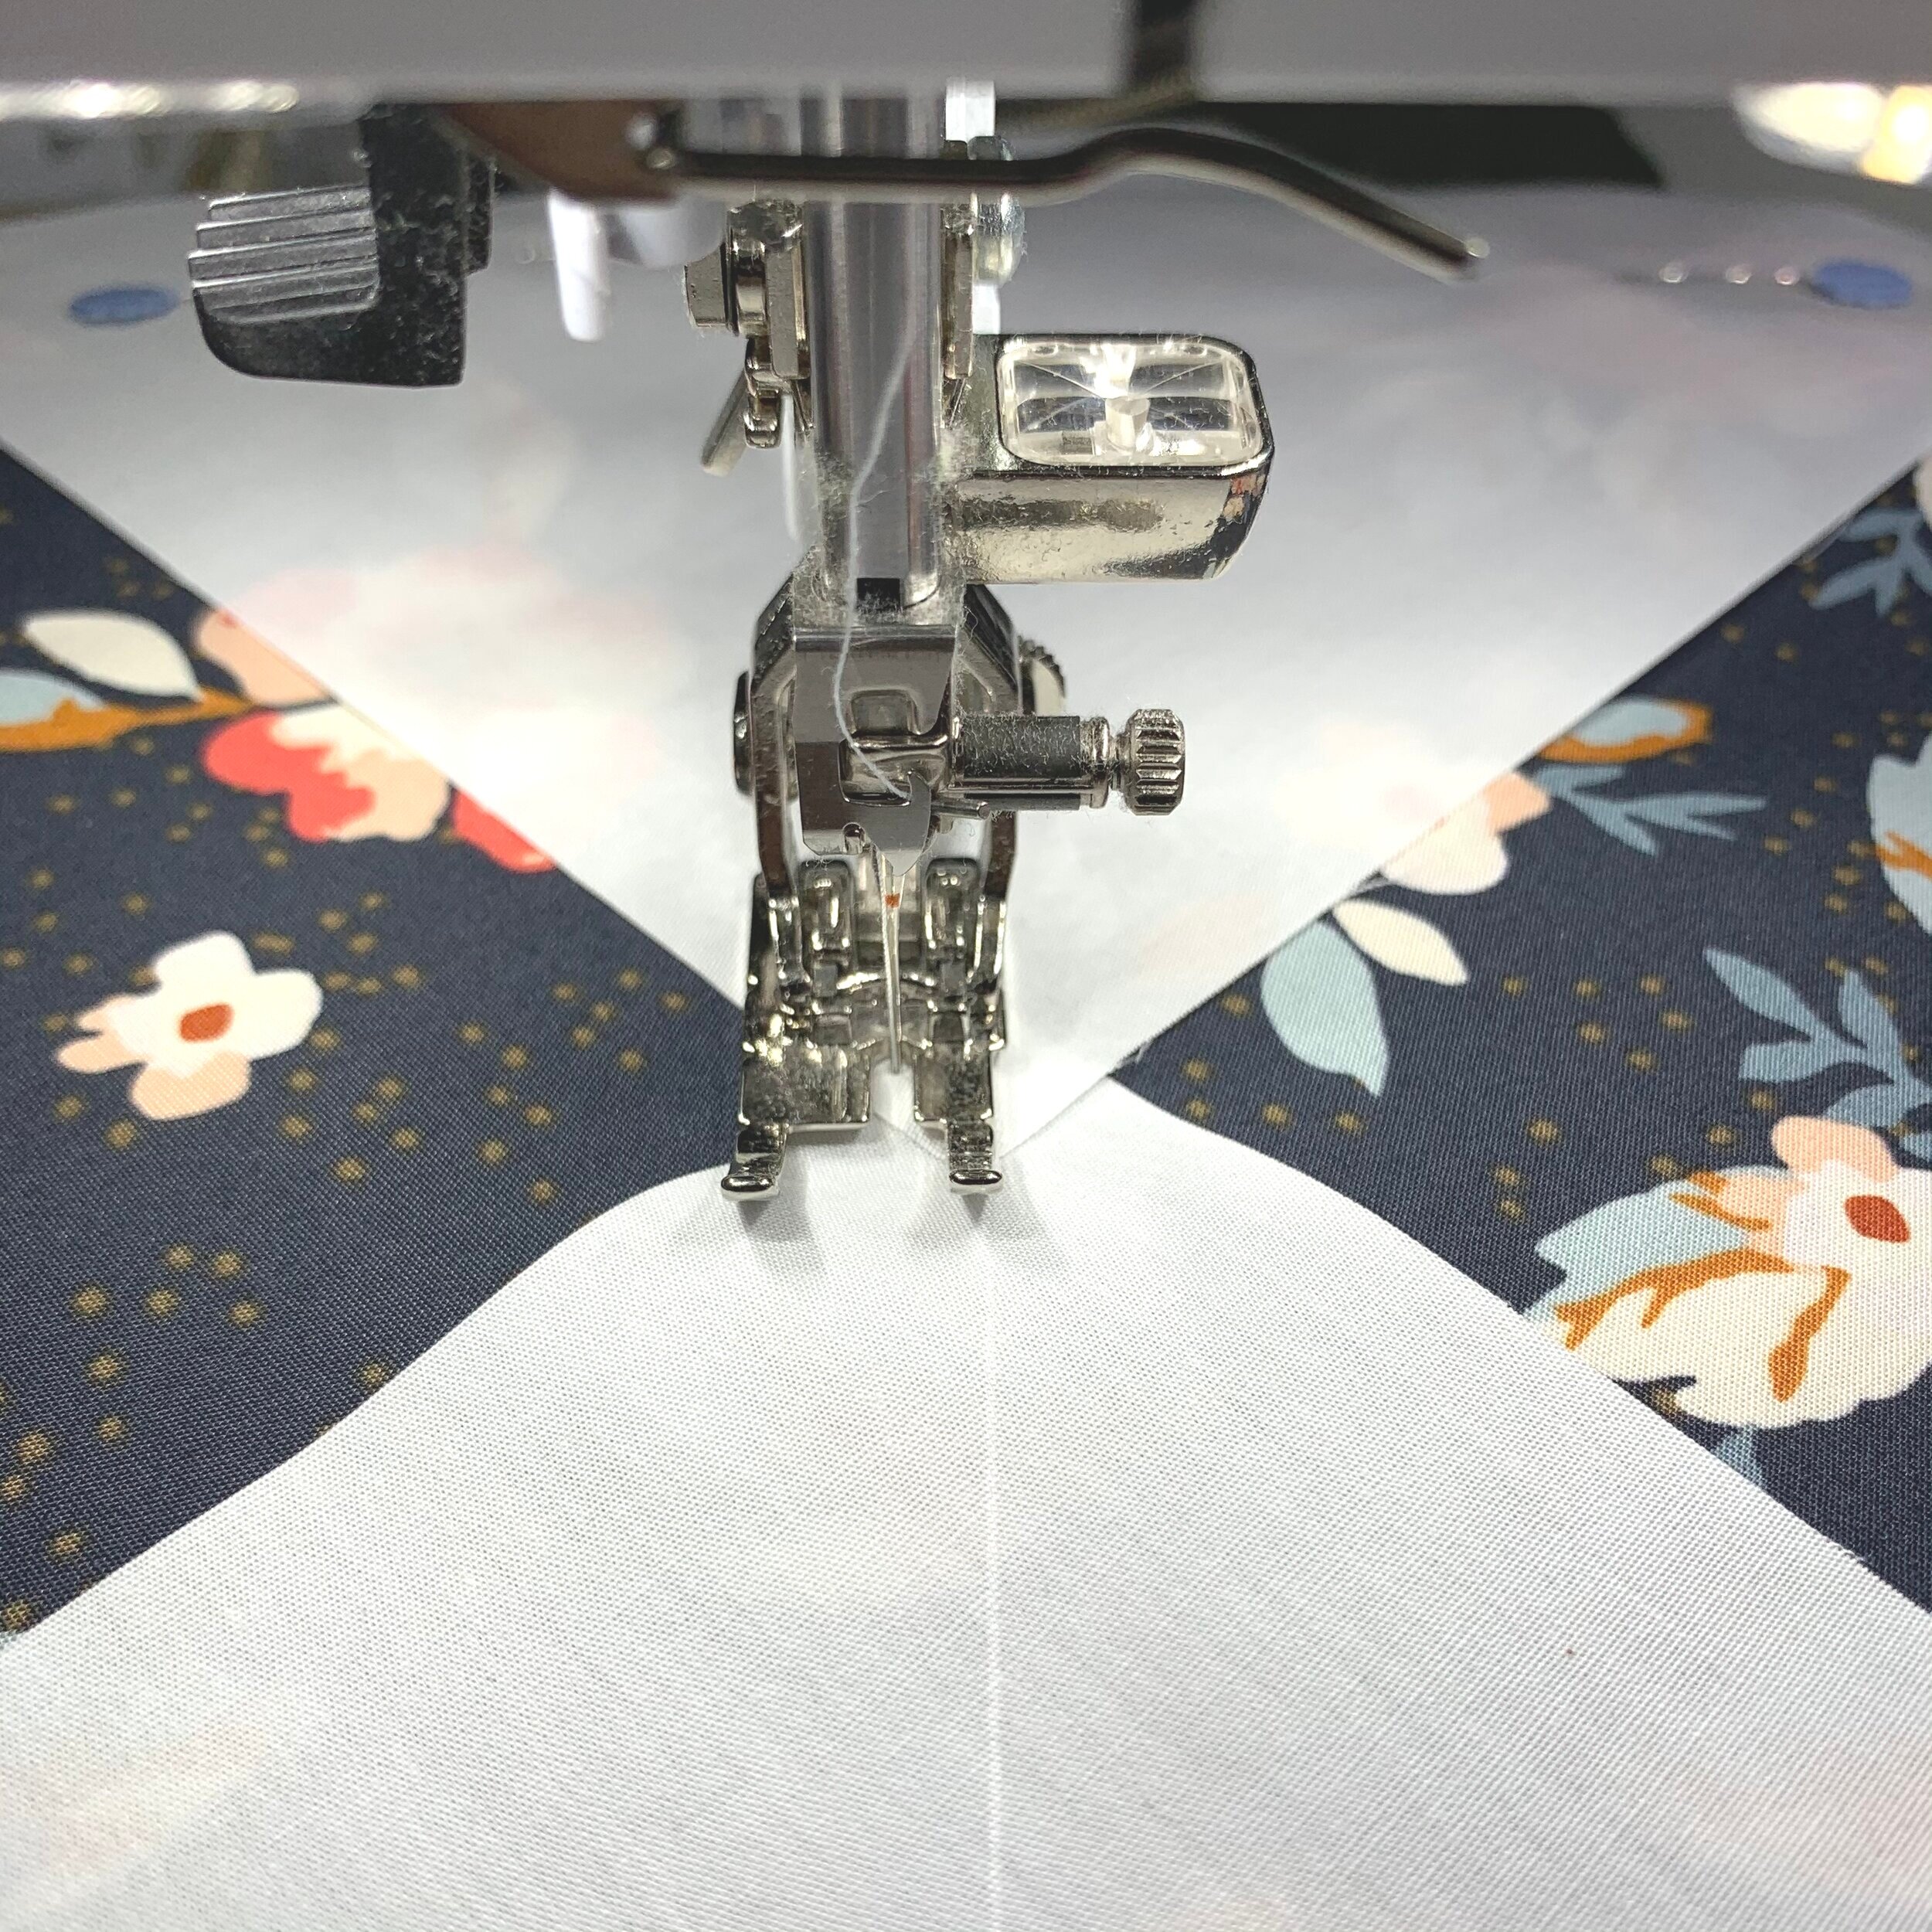
7. Sew a ¼” seam on each side of the marked line. Repeat with the other unit.
Pro tip: Ensure you sew through the “x”, marked with an arrow on the image.
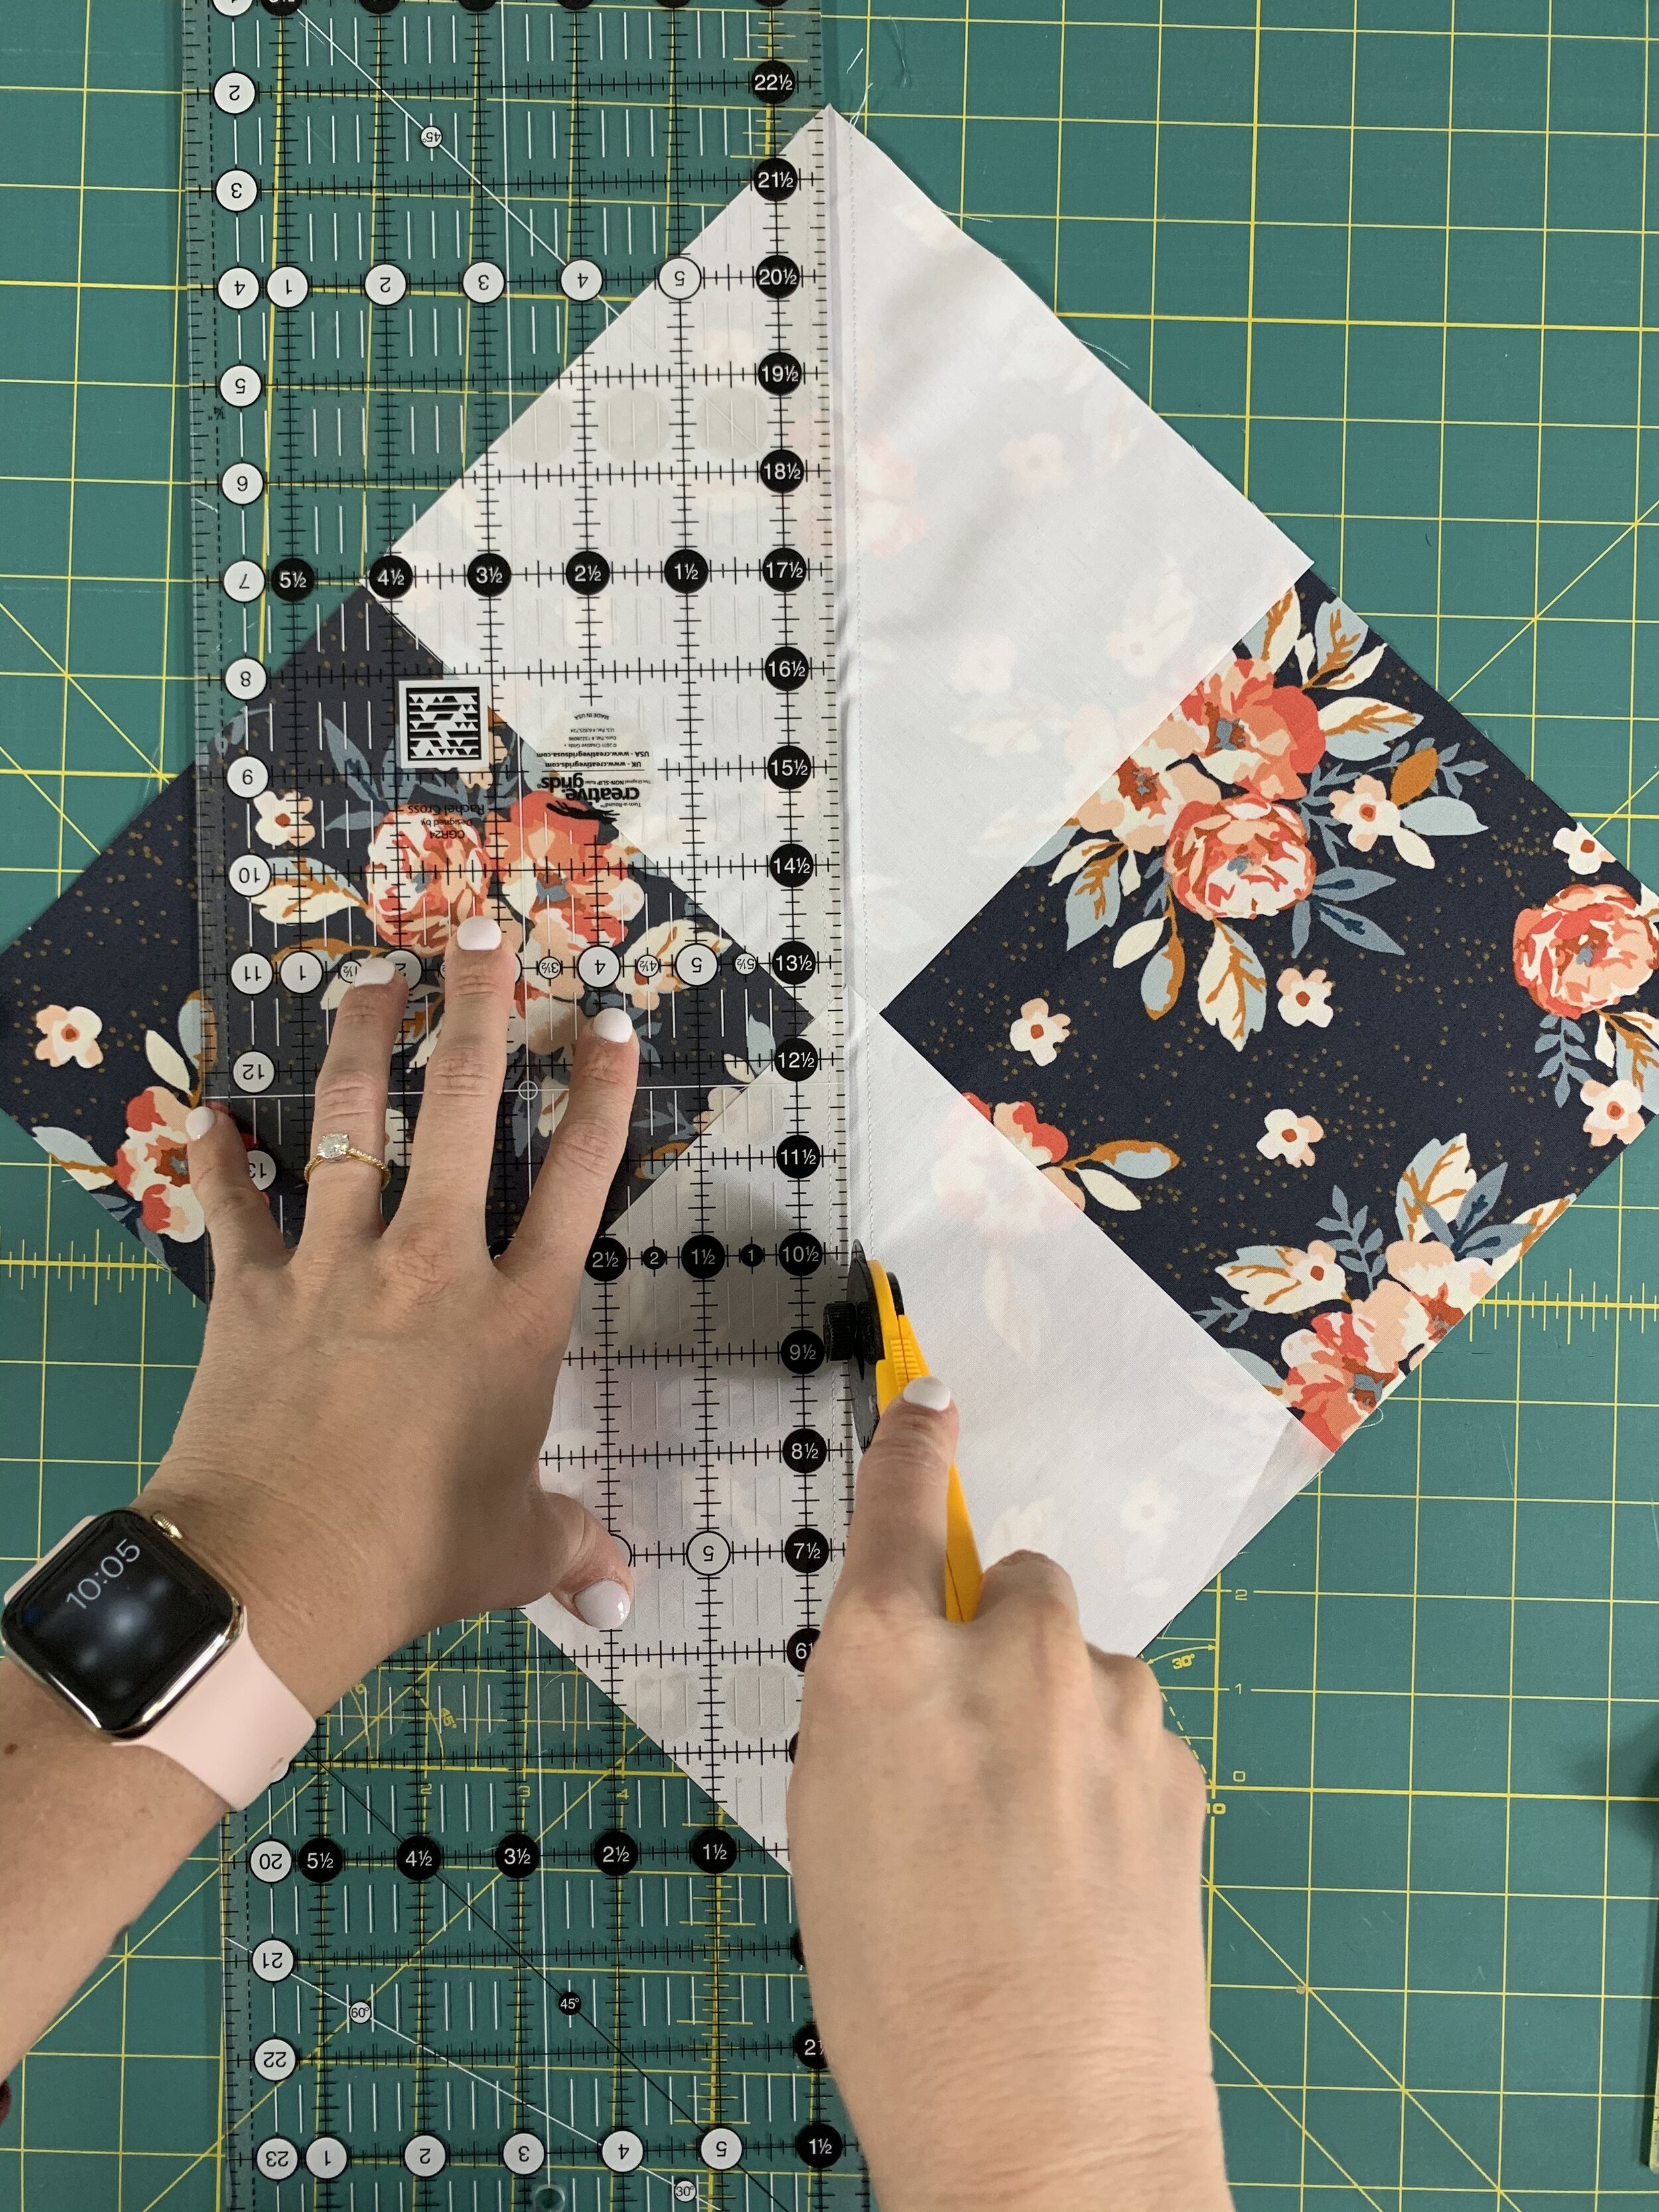
8. Using your rotary cutter cut on the marked line.
Repeat with the other unit.
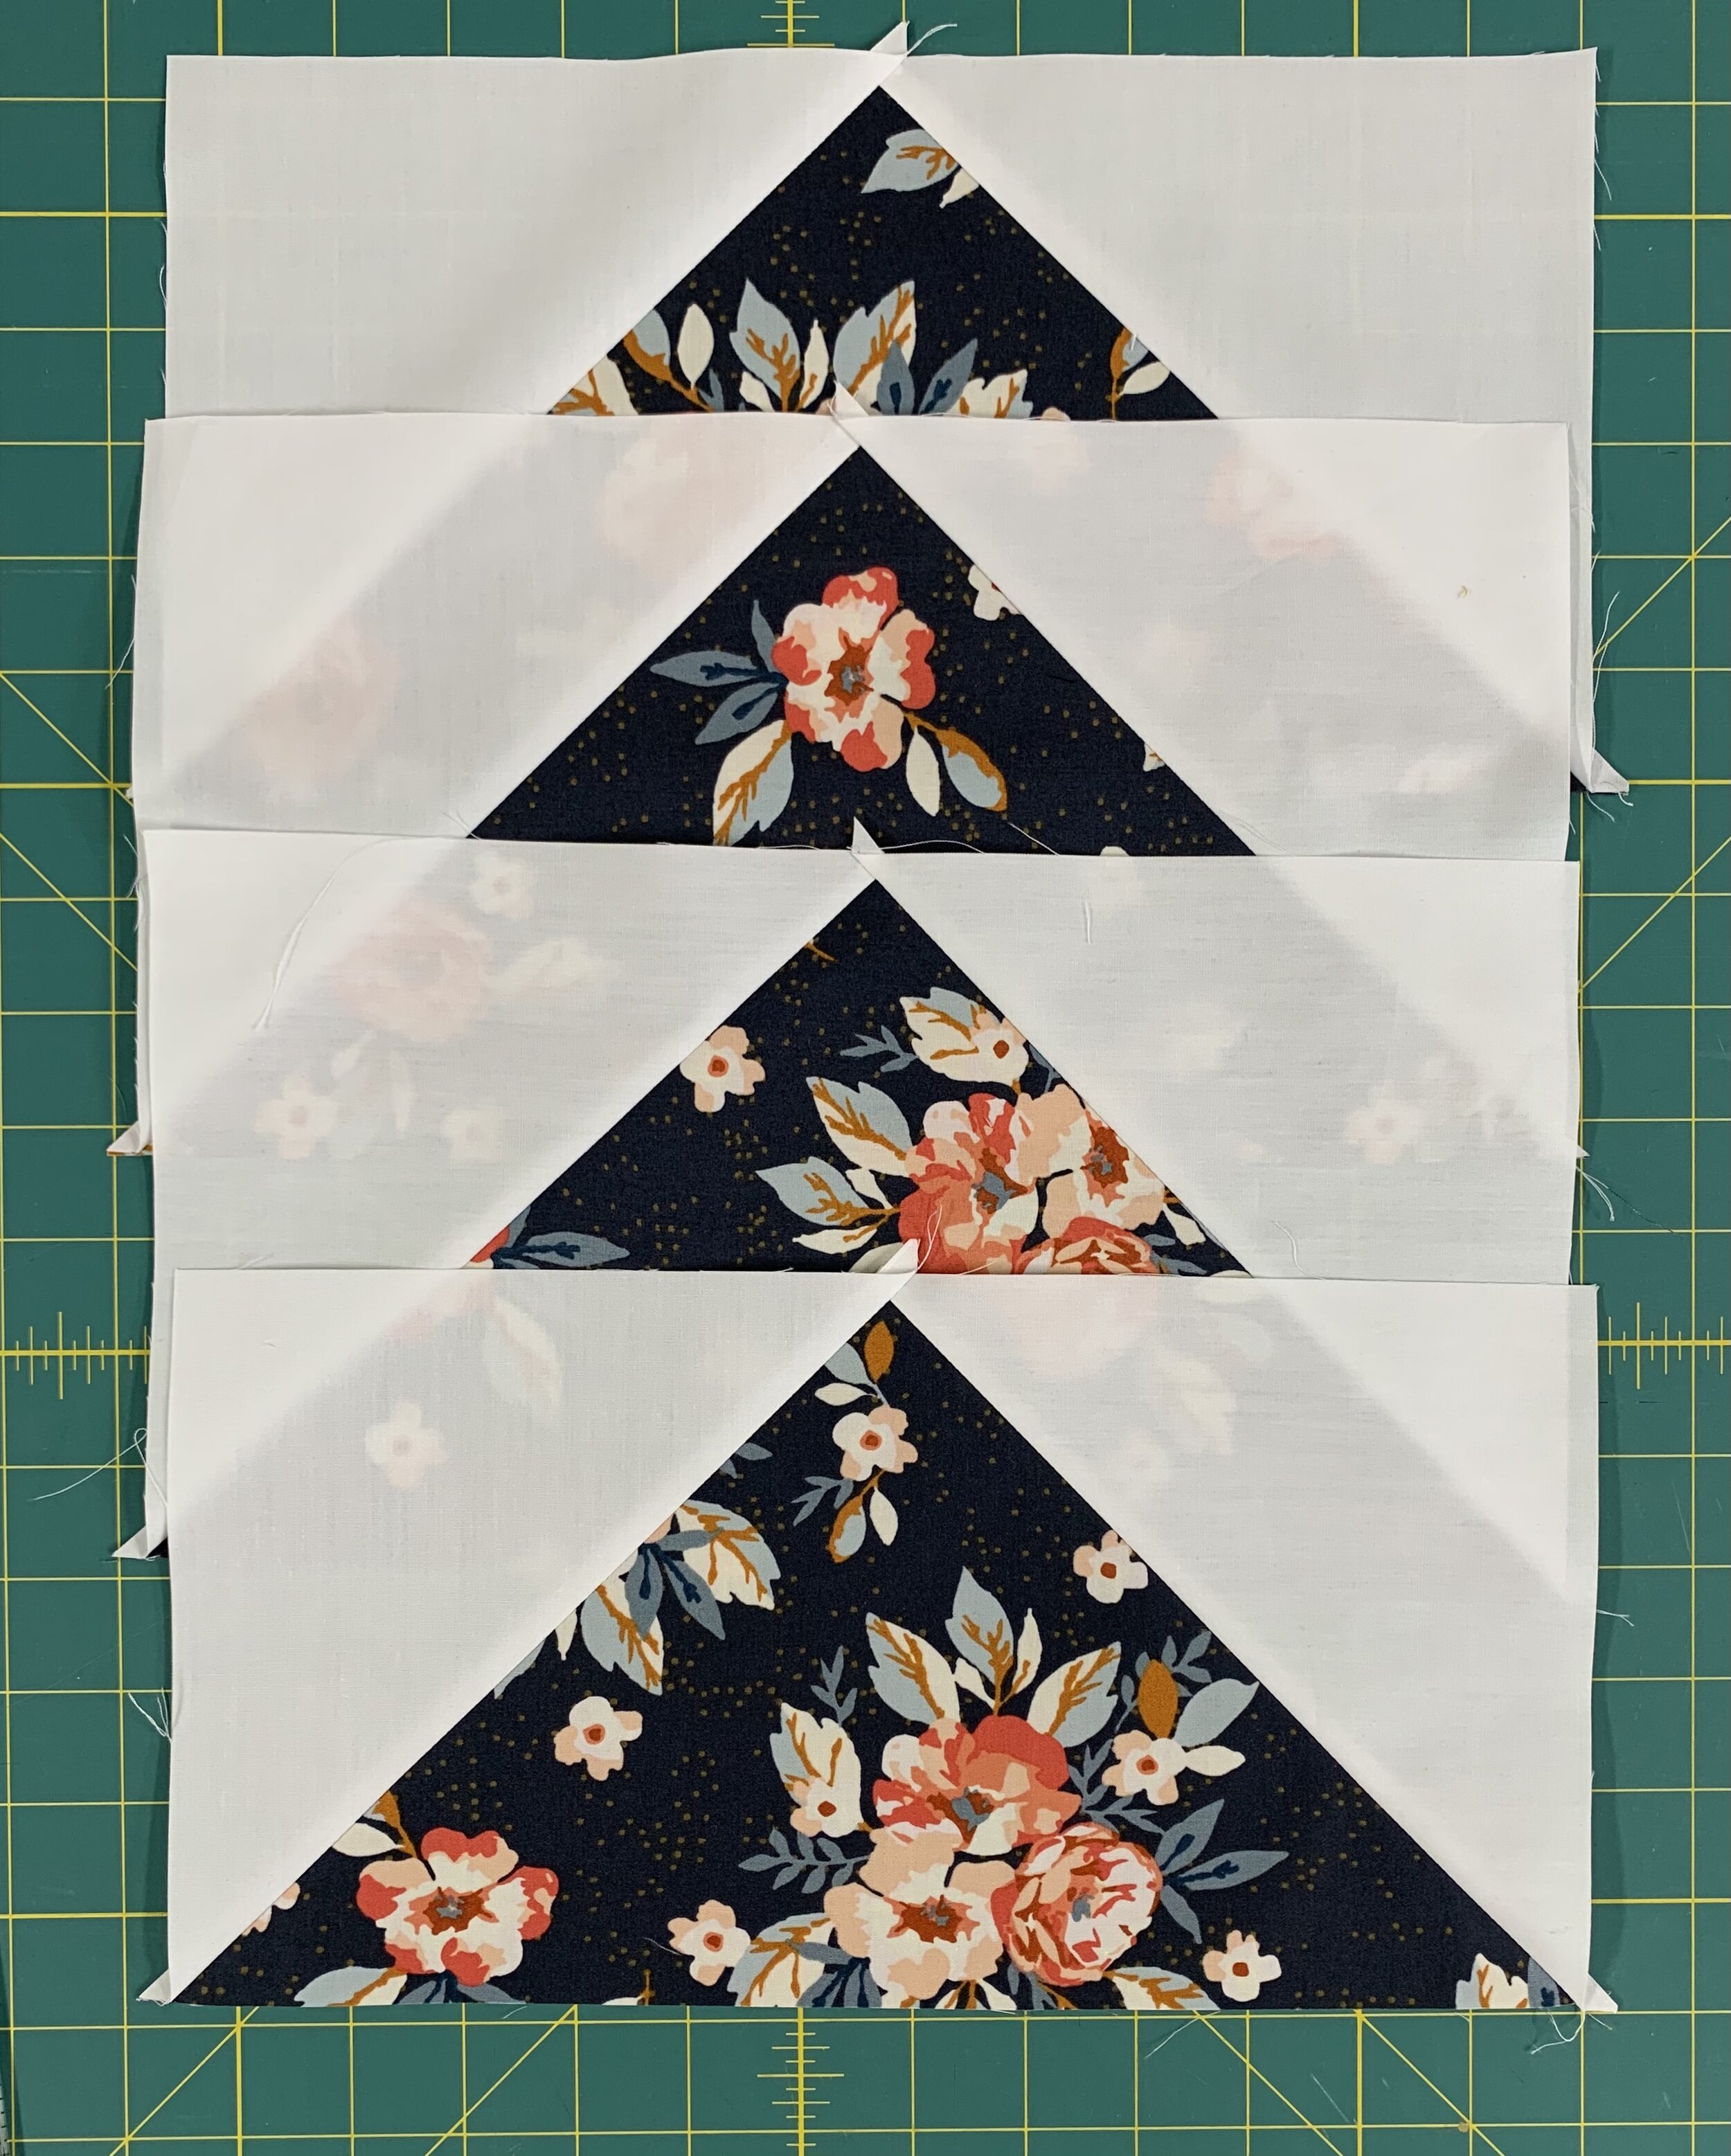
9. Flip corner up and press.
Tada! You now have 4 Flying Geese!
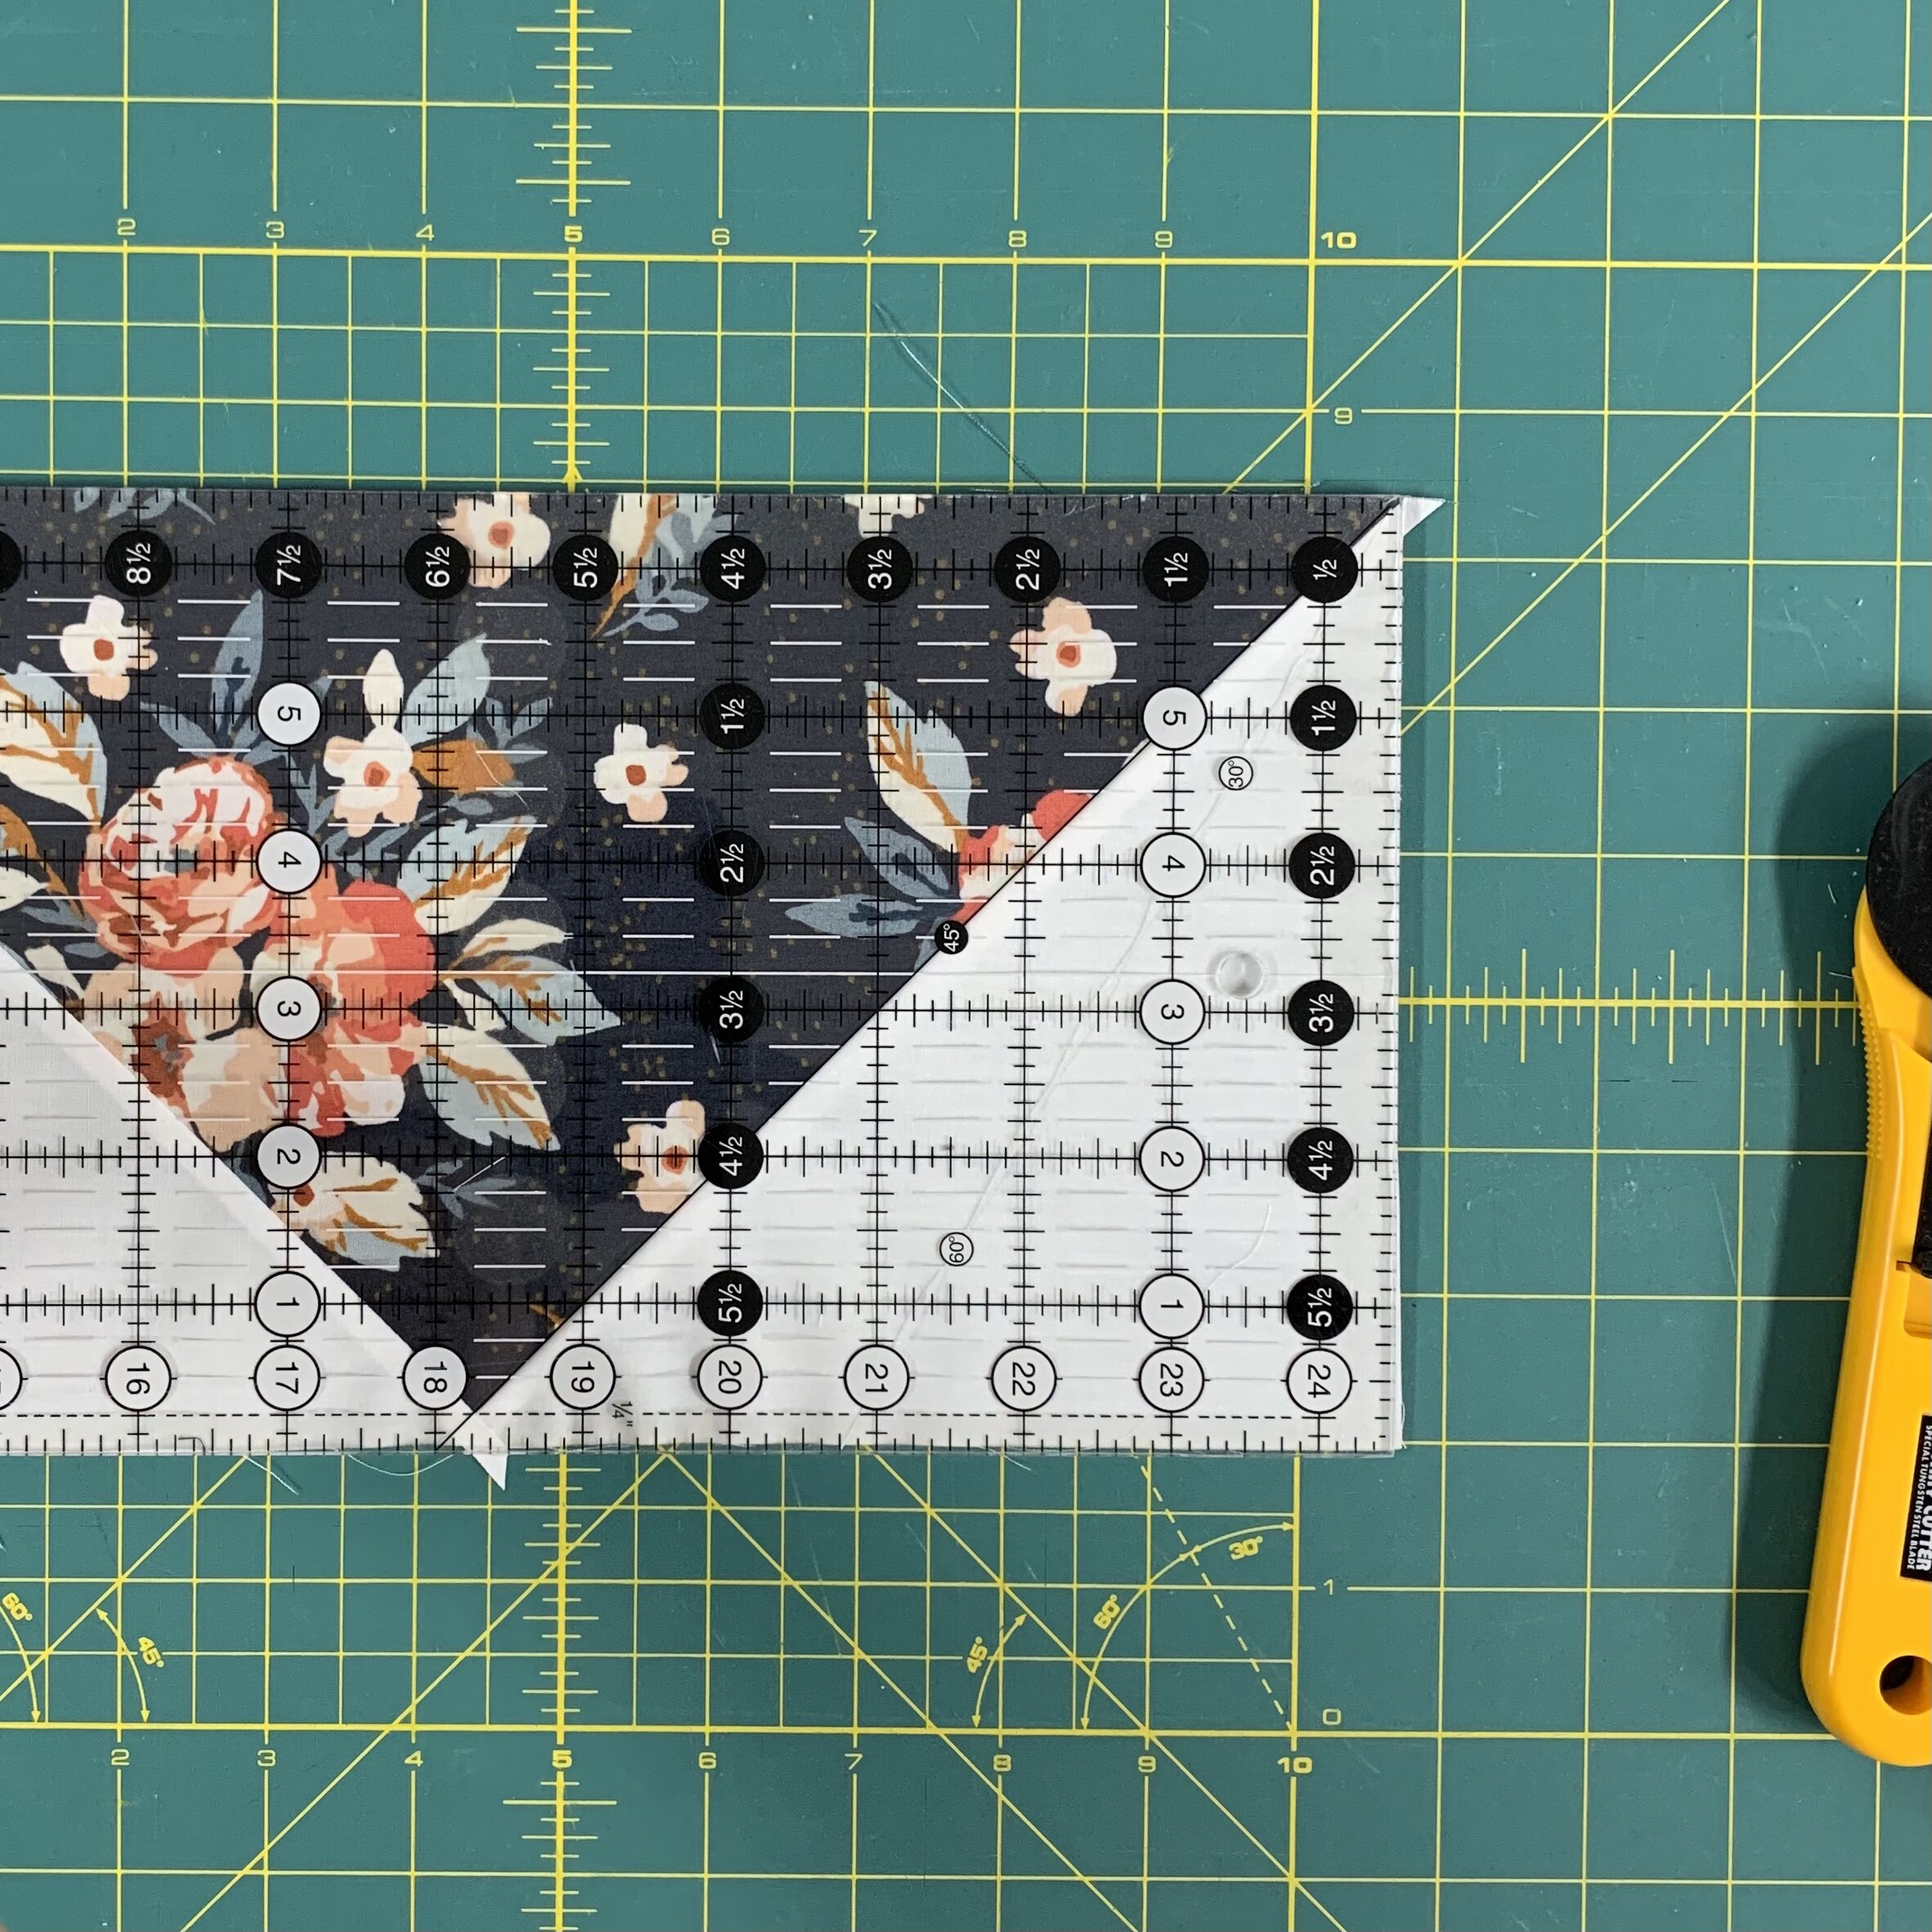
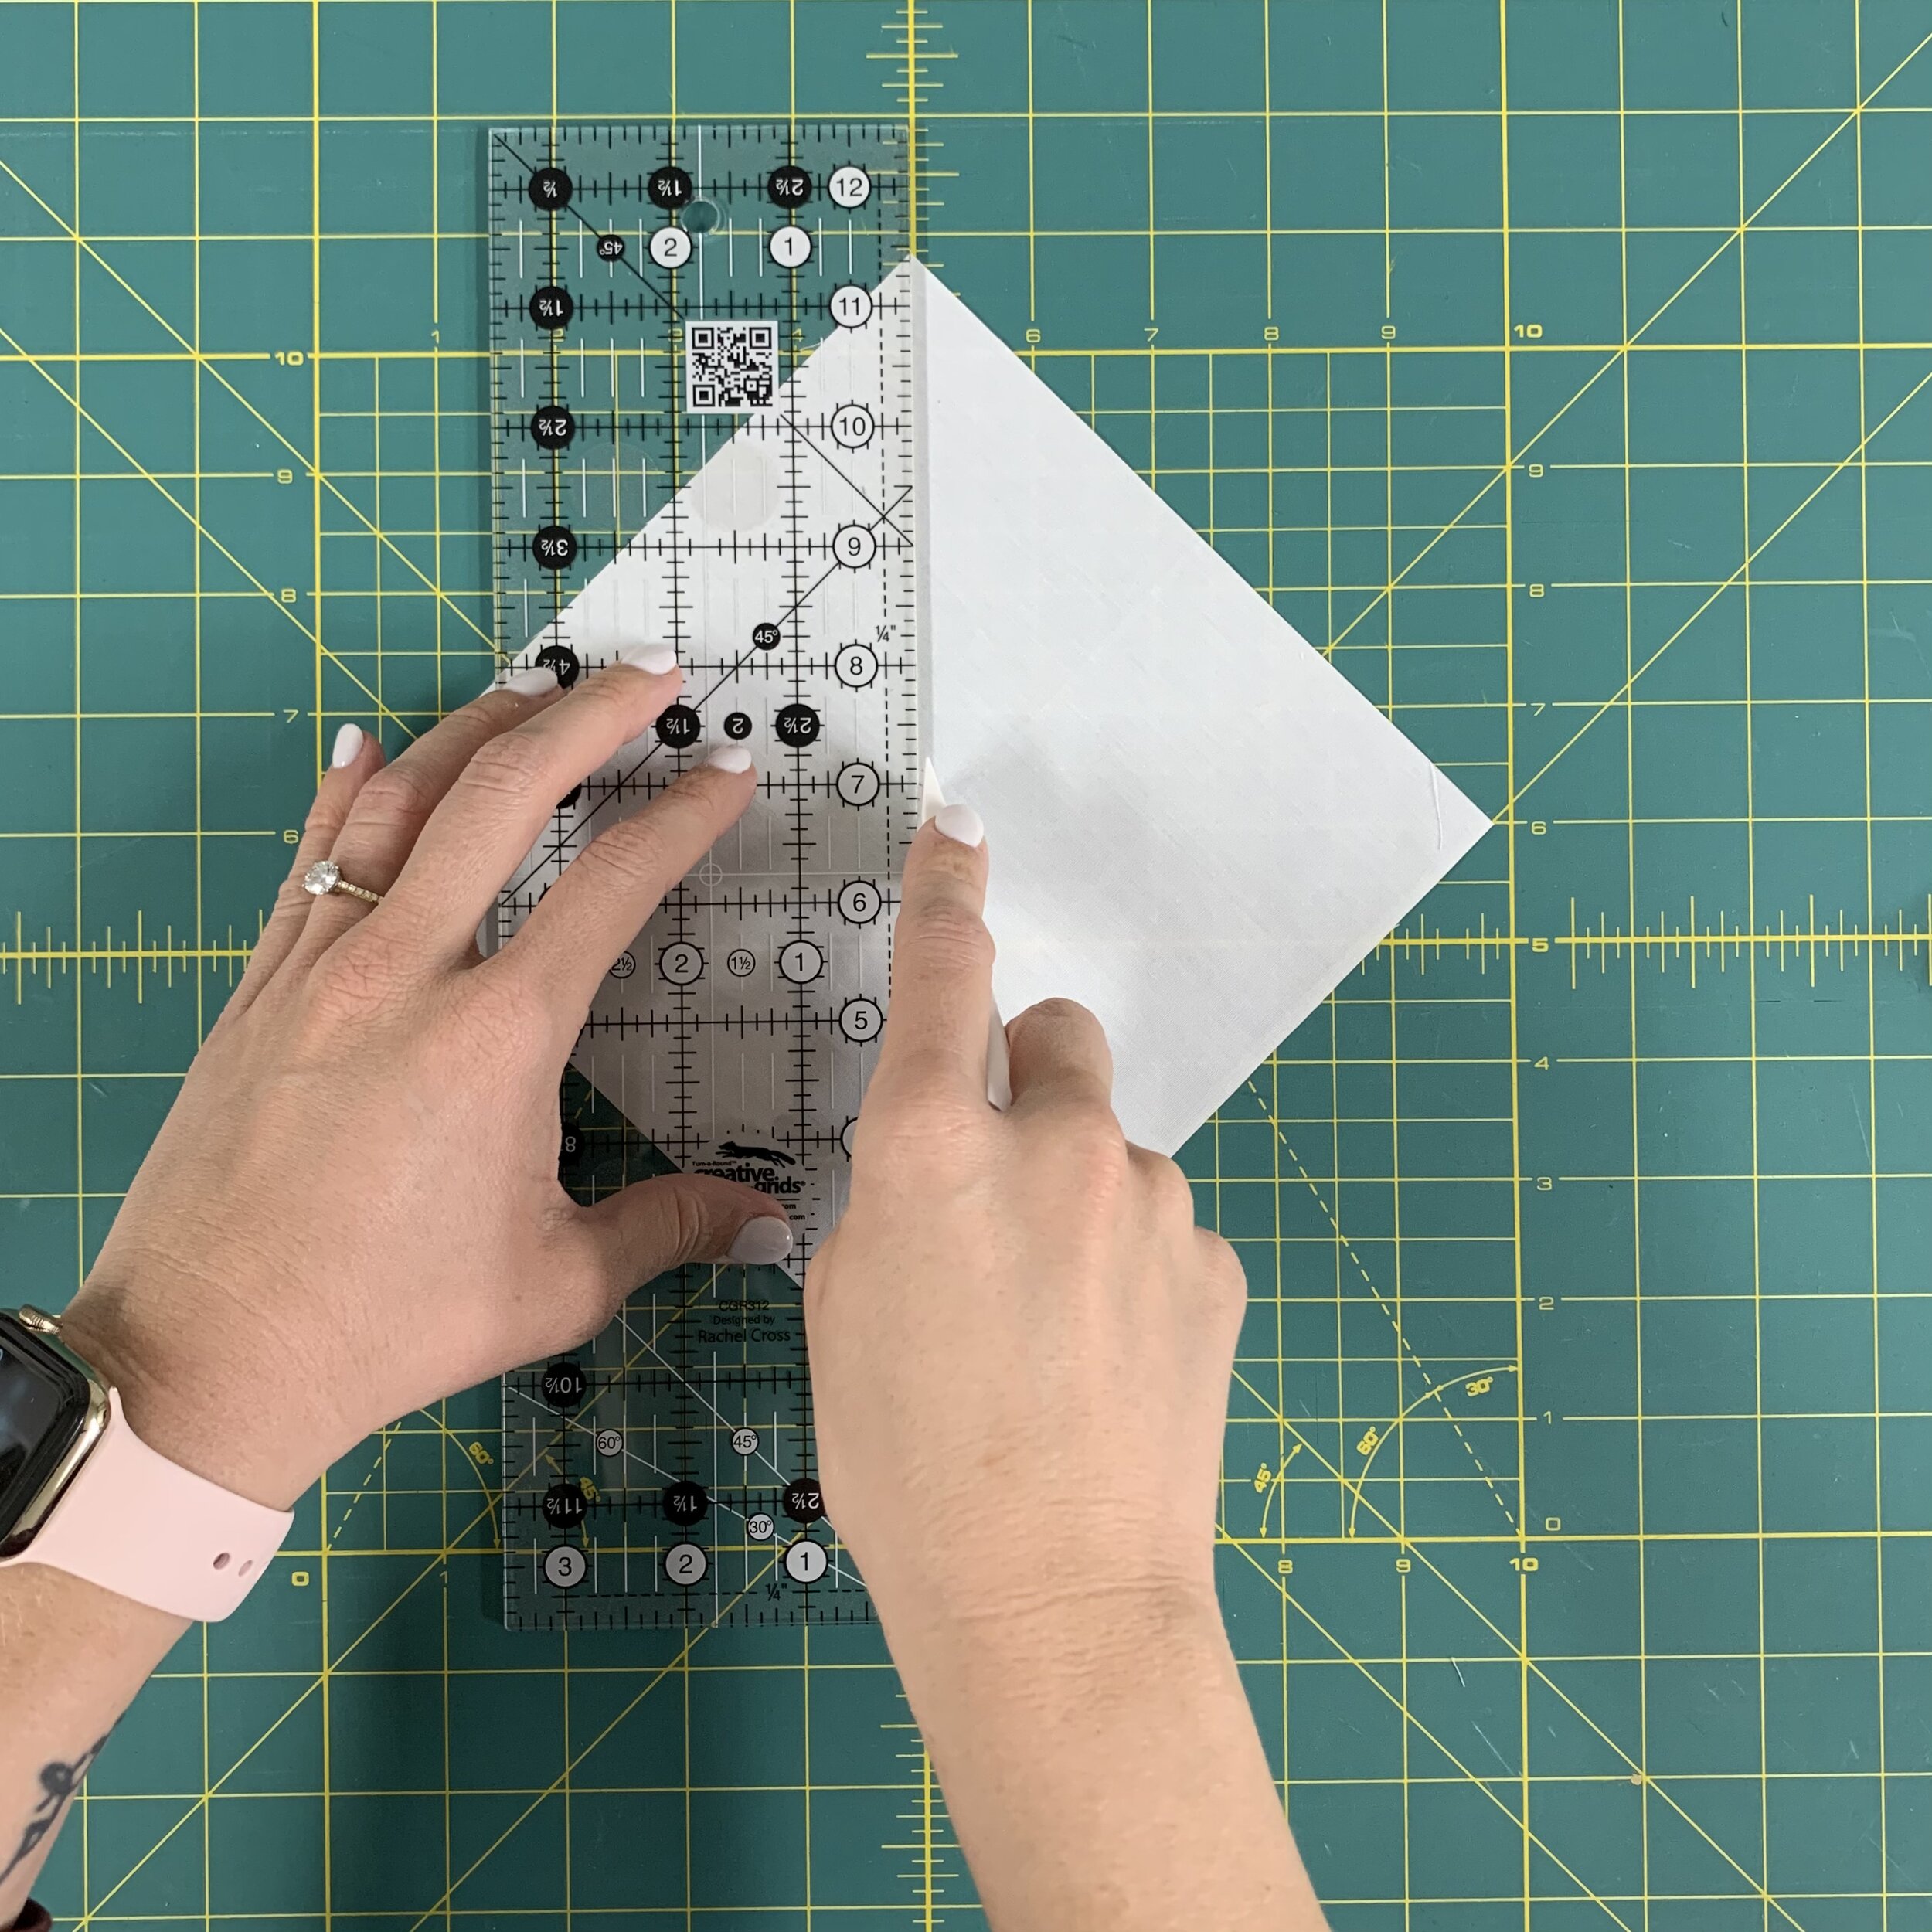
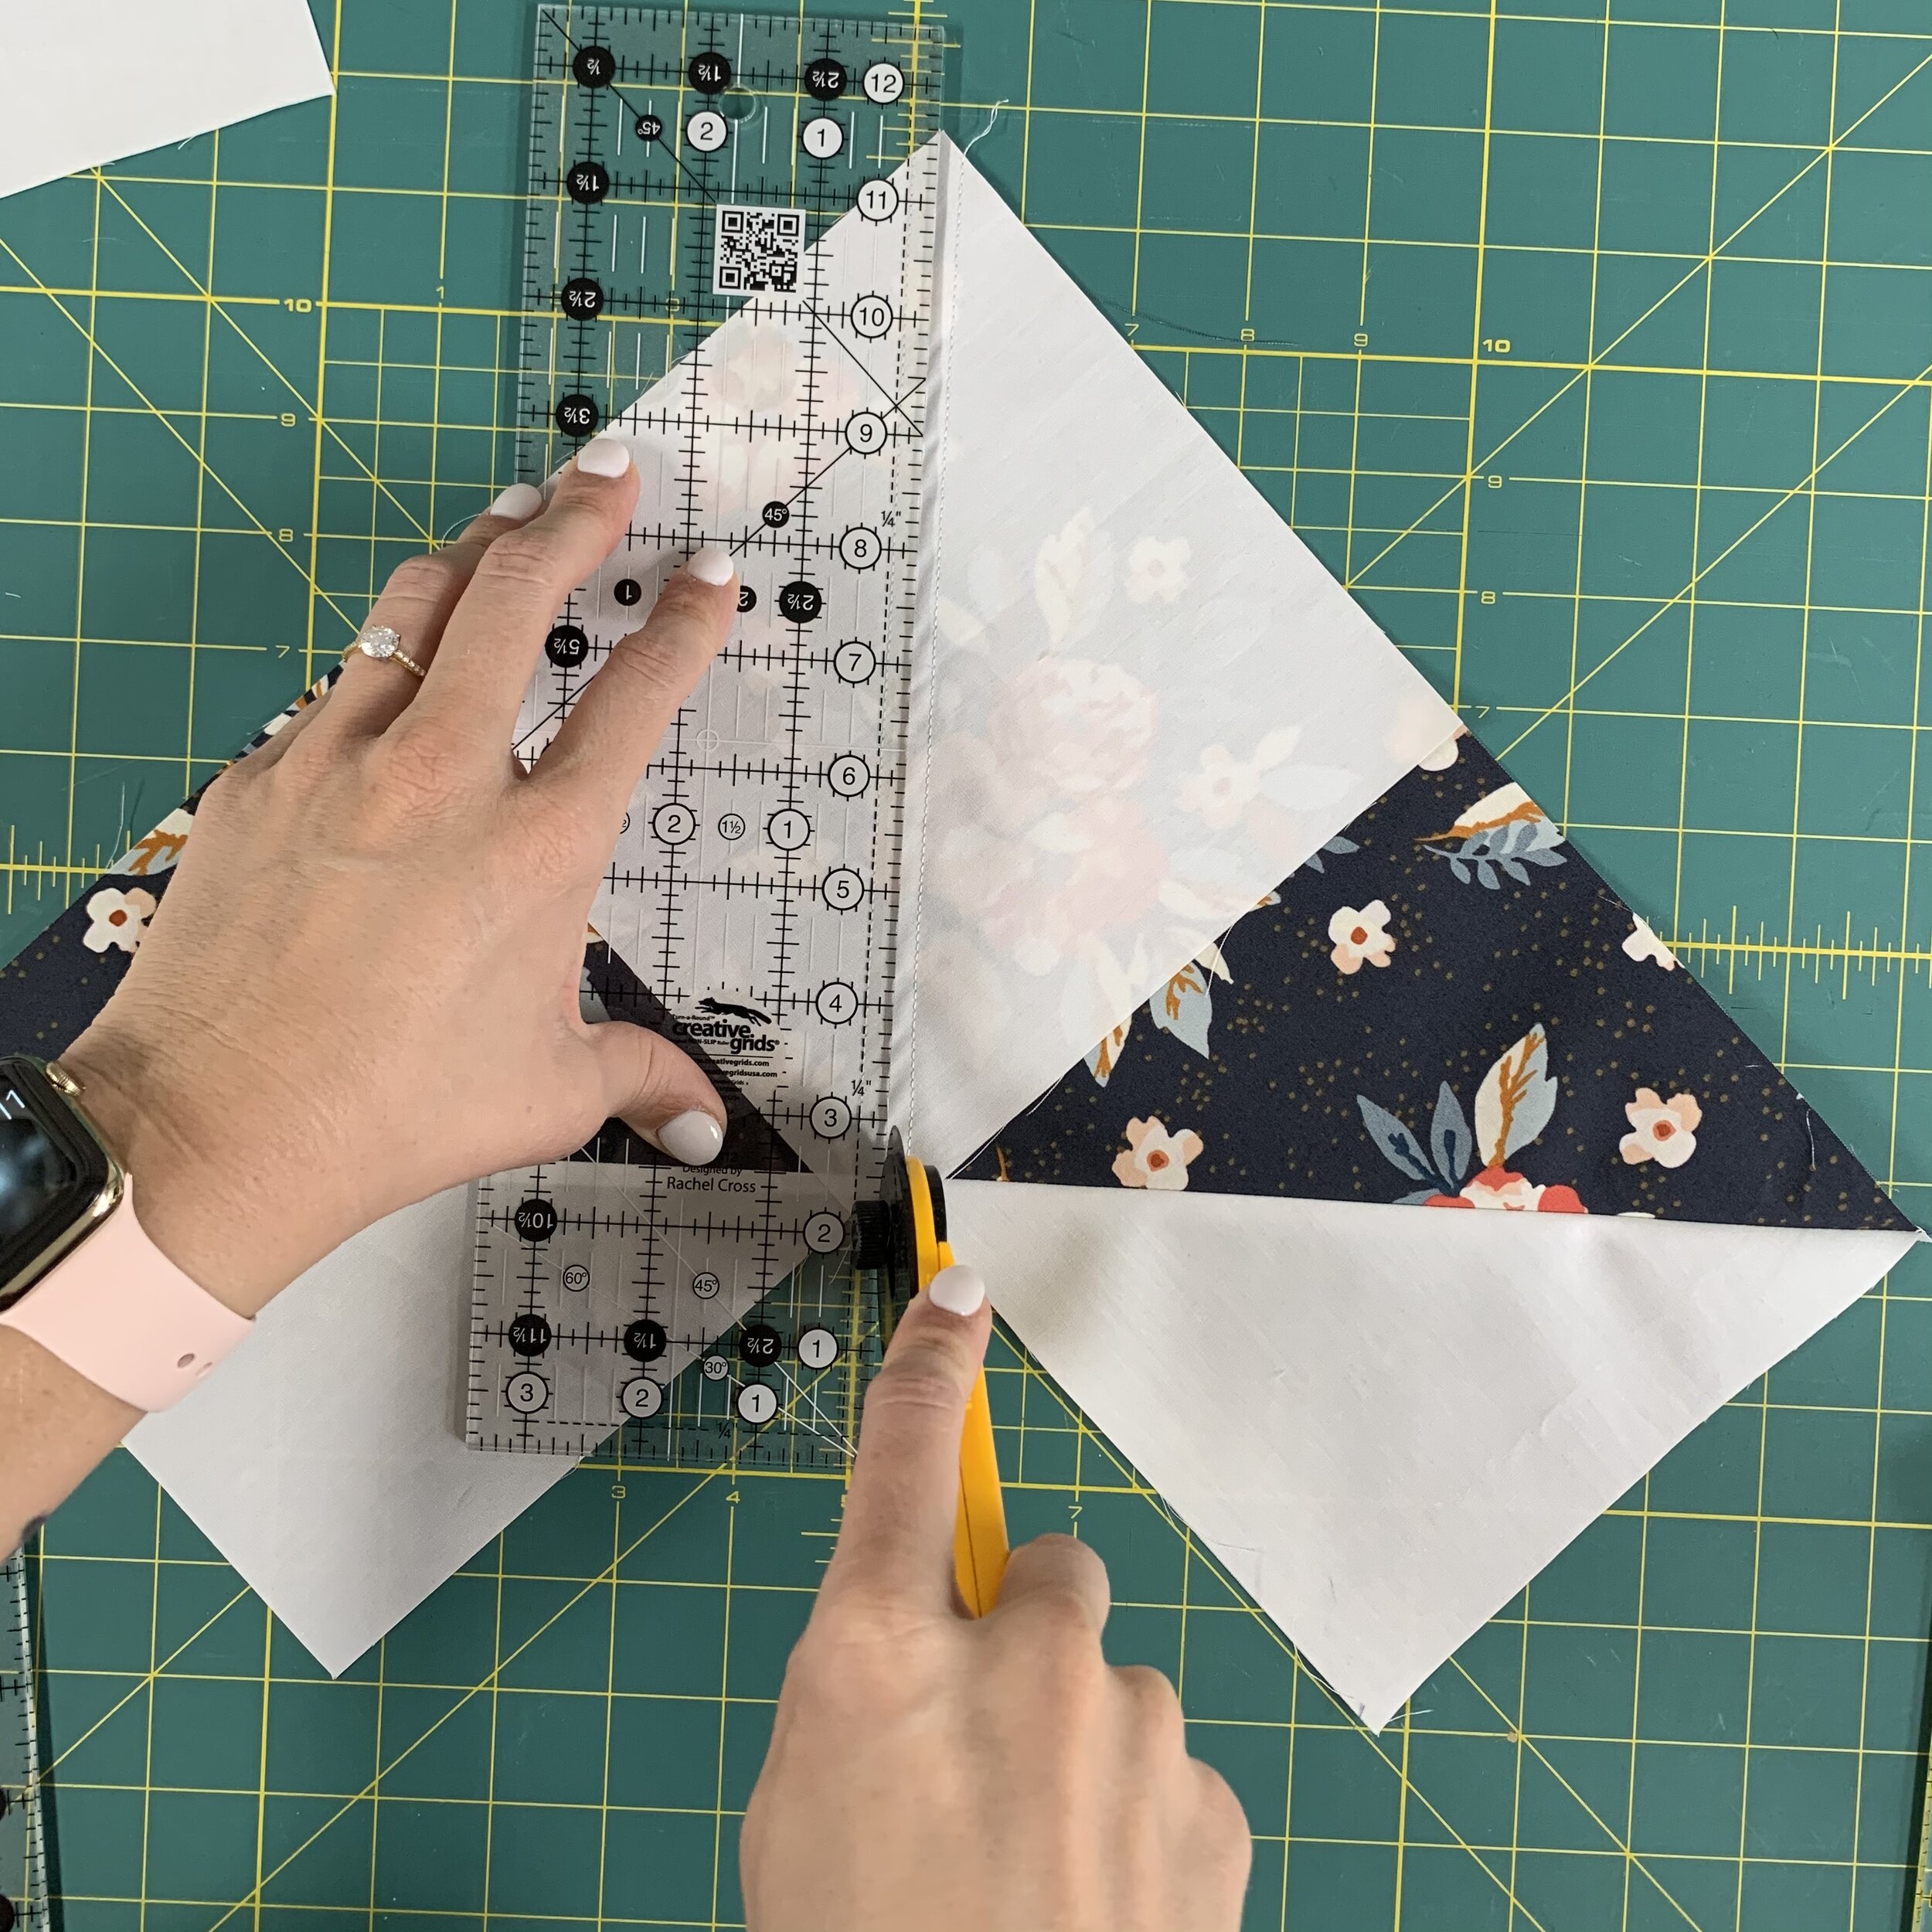
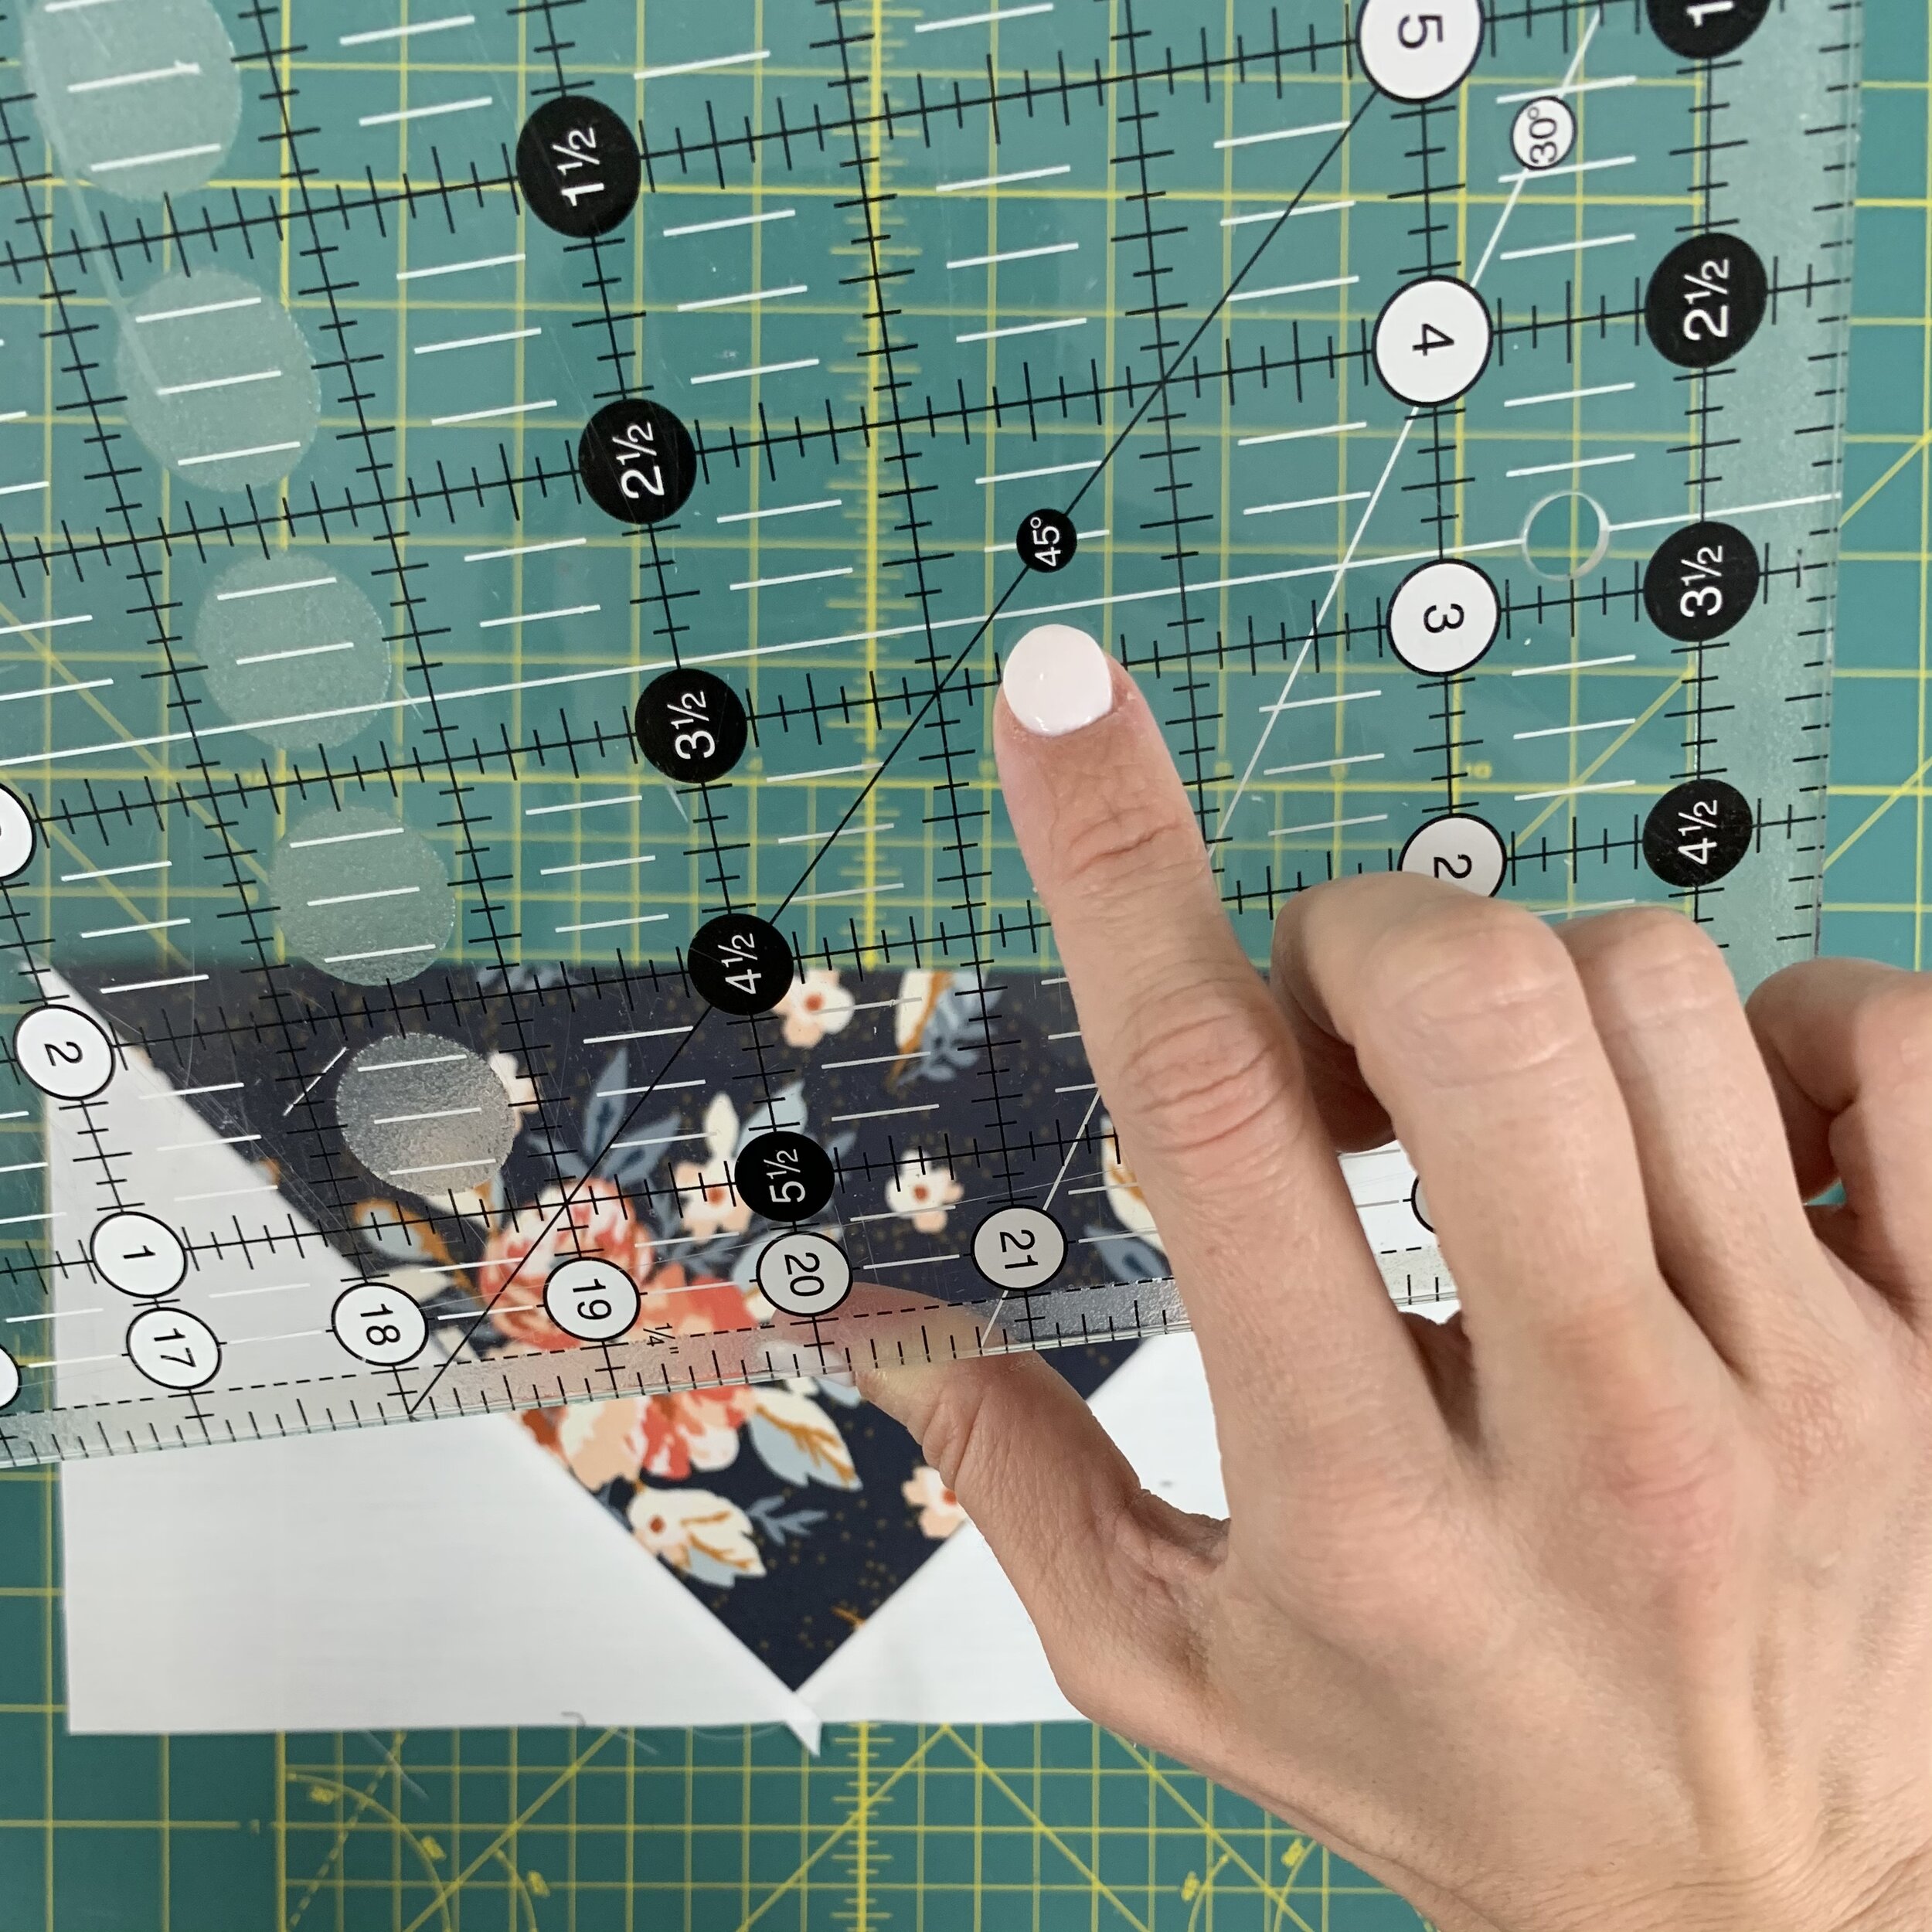
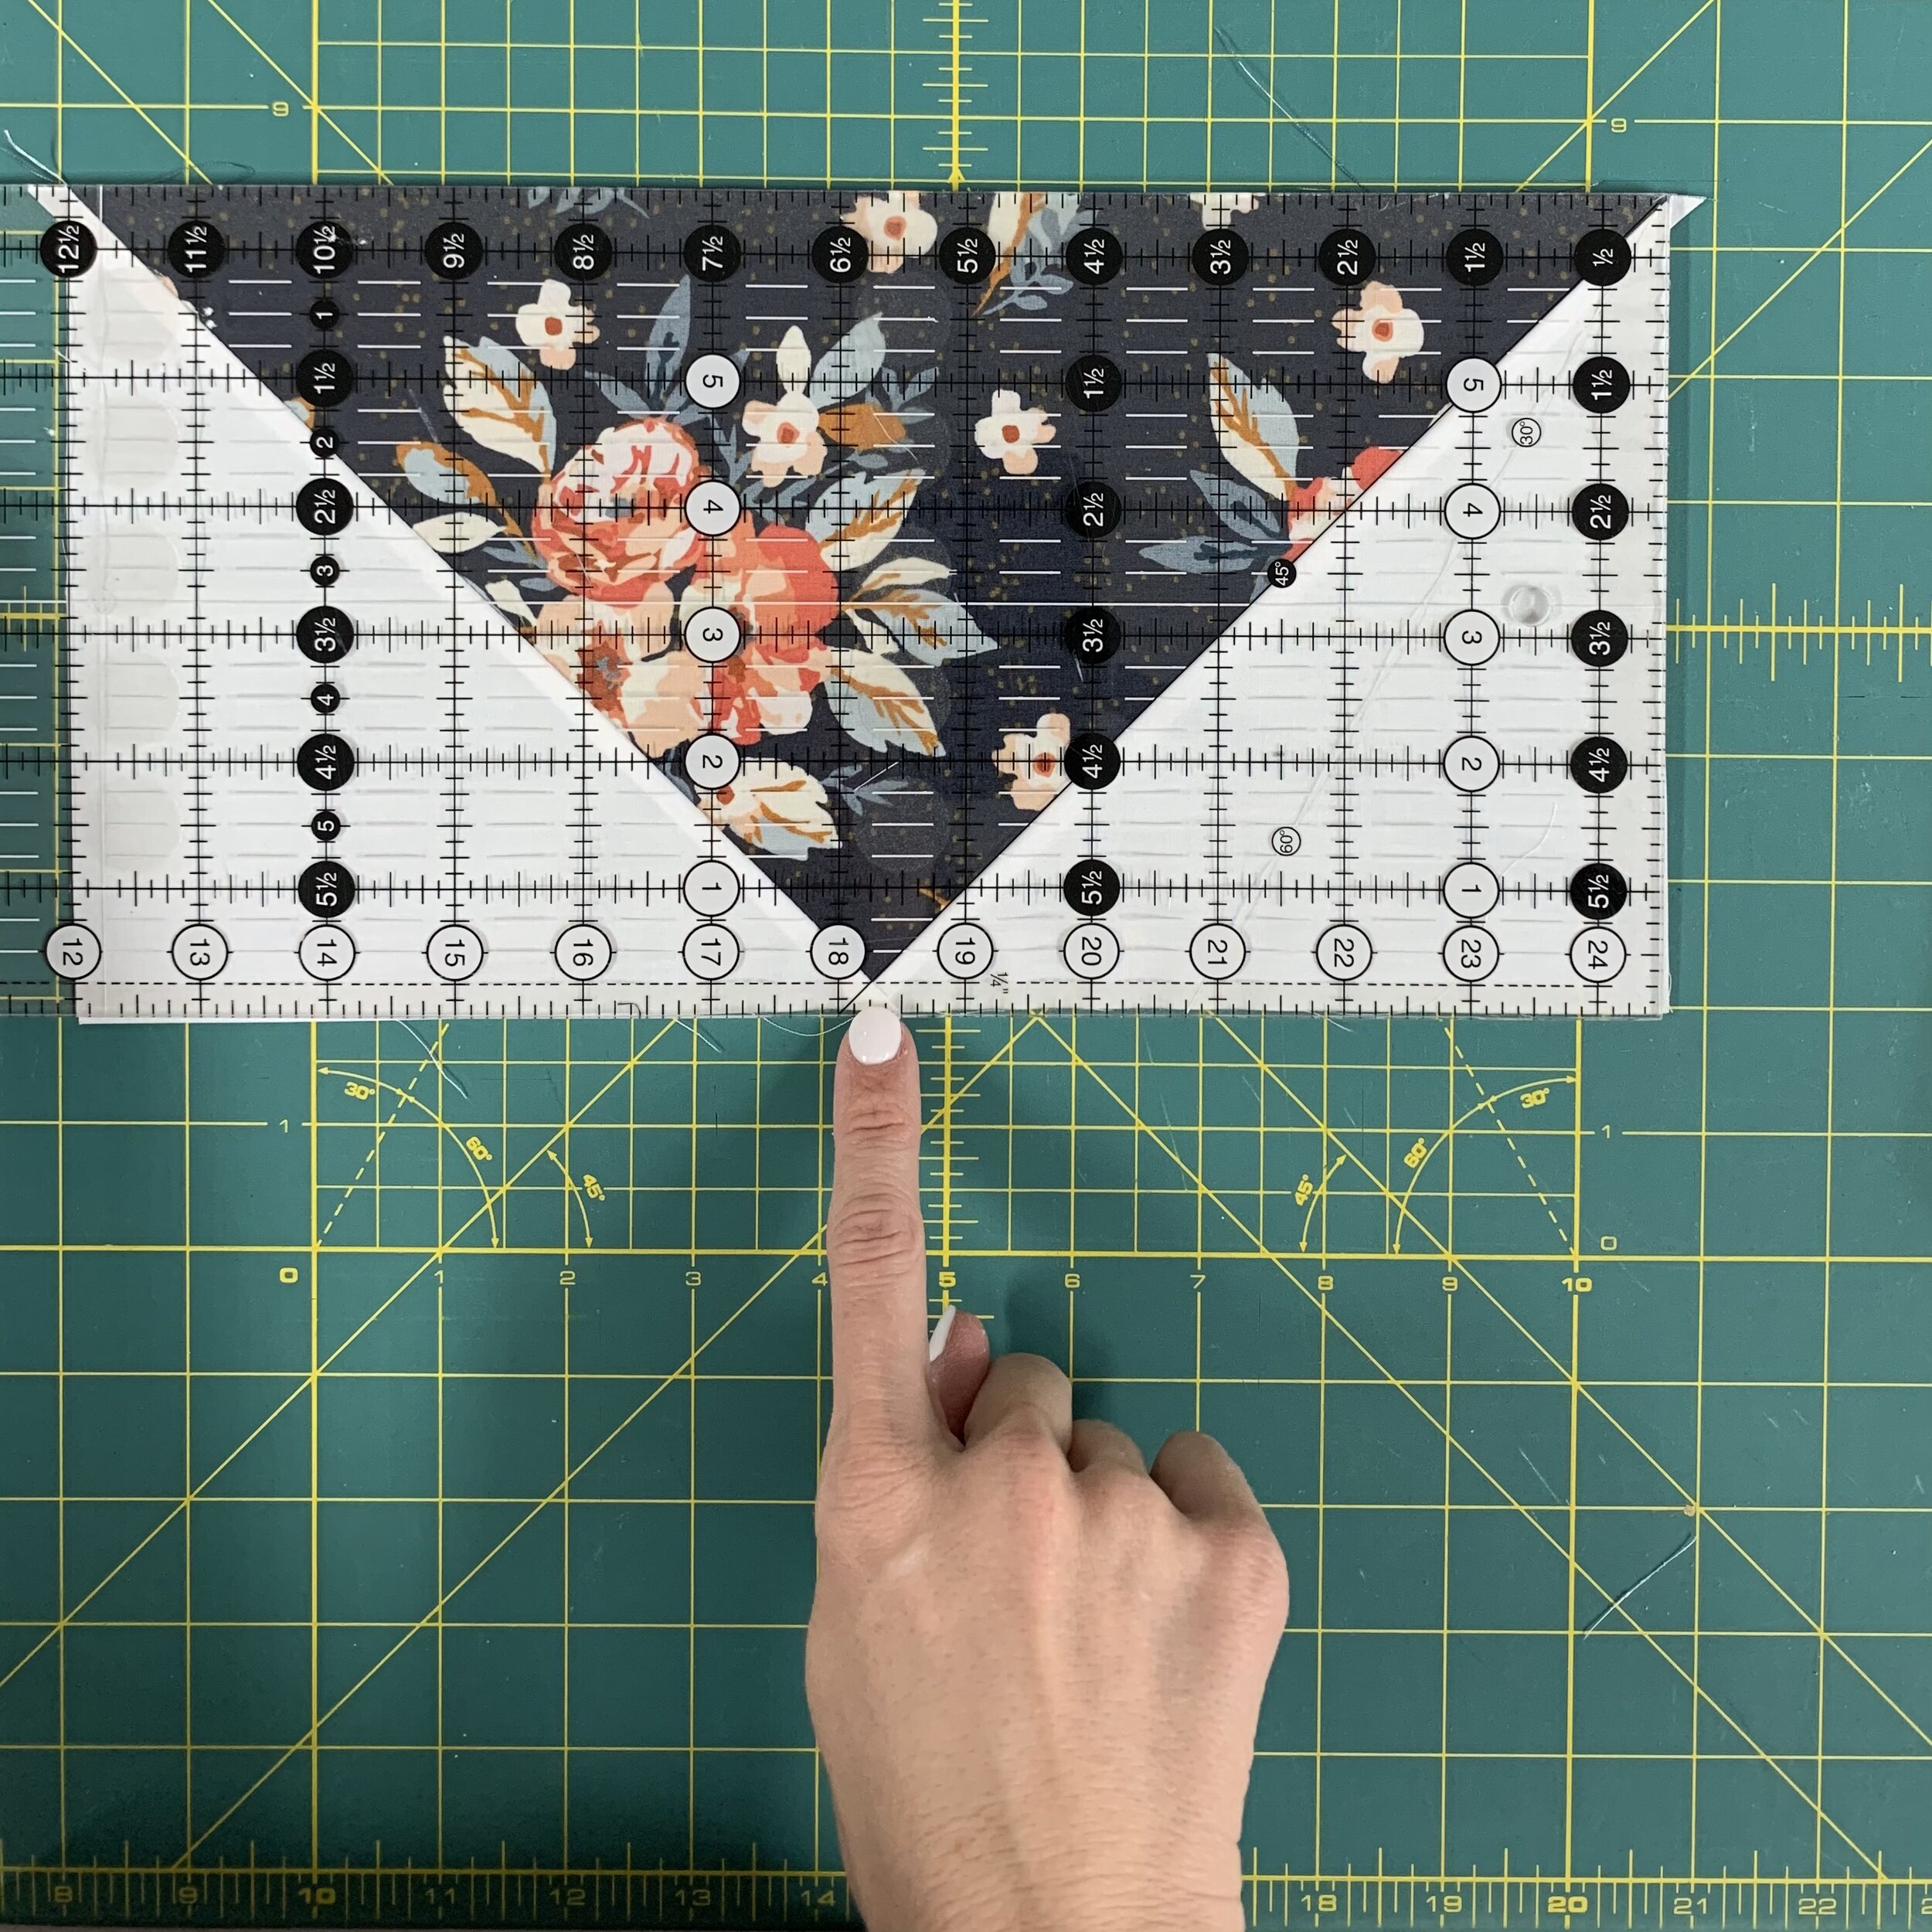
10. Trim each Flying Geese to measure
6 ½” x 12 ½” unfinished will be 6” x 12” finished.
Pro tip: For these bigger geese I use my ruler (6 ½” x 24 ½”) to my advantage by aligning the 45 degree mark with the diagonal and the ¼” mark at the point.

Calculate Flying Geese
Use these charts to help you identify how much wiggle room you may have while making your geese. The traditional method will give you just enough of what you need with minimal trimming. From my experience using a scant ¼” seam works best with the traditional method. On the other hand, the modern method will give you a little more wiggle room. If you enjoy having a little more room for error the modern method is for you!
Pattern writing? Feel free to use these calculations any time.

Hello! I’m Katie the maker behind Zahm Co. Thank you for being here, I hope you find this blog helpful.
For blog notifications, sign up for the newsletter!