Chain Piecing for Patchwork
Use the chain piecing method to save yourself time and thread while sewing patchwork blocks. It took me a while to grasp this concept but now I love it and wished I had learned it sooner in my sewing journey. Trying it a few times and I think you’ll be happy you spent the time learning the concept as well.
In this blog, I’m using chain piecing to create the Middle Sister blocks.
Let’s go!
Supplies Needed:
Trimmed HST squares
Ready to use sewing machine
Thread cutting scissors

How-To: Chain Piece
Time Spent: 5 - 7 minutes for one block
I recommend watching the video for detailed instructions. Short on time? I love watching YouTube videos at increased playback speed (under settings) to save time.

1. Lay out HST in the block, following the direction and number of units needed per pattern.
Stack the HST to sew multiple blocks at once.

2. Take the right HST to fold onto the left HST. In this case, the middle column will fold onto the left column. Pin as desired.
Note I took the three rows in step one and consolidated them into one row with three columns since these blocks all use the same fabric. I would skip this step using the Color Blast version to prevent mixing up your fabrics.

3. Sew the two HST right sides together. Take time to ensure the corners align as this is an important step in accurate sewing.
I do not pin at this point but hold the squares with my fingers or porcupine quill (stiletto).

TIP: Chain piecing is when you continuously sew one piece after the other. Do not break your thread.
I will keep sewing each block between columns 1 and 2 until done. Then cut the thread from the machine.

My chain piece for columns 1 and 2 of my 9 block. Note this is for four 9-HST blocks. I will then cut every third HST. See the next photo.
Note the continuous pieces are held by the thread.

I cut every third HST to bring them back to the original pattern size.
Can you see the small thread holding them together? YES, good we like that.

4. Open the two HST and place your third column HST block to the right.
Ensure the HST is still laying in the correct direction. Notice the chain pieces are still attached and hanging.

5. Flip the far right HST onto the middle HST, right sides together, and sew. Pin if desired.
Notice the chain pieces are still attached and hanging.

Repeat steps 4 and 5 until all the third column HST are sewn onto the second column.
Notice the chain pieces are still attached above and below your unit.

How the 9 HST Block will look after each HST column is sewn together.

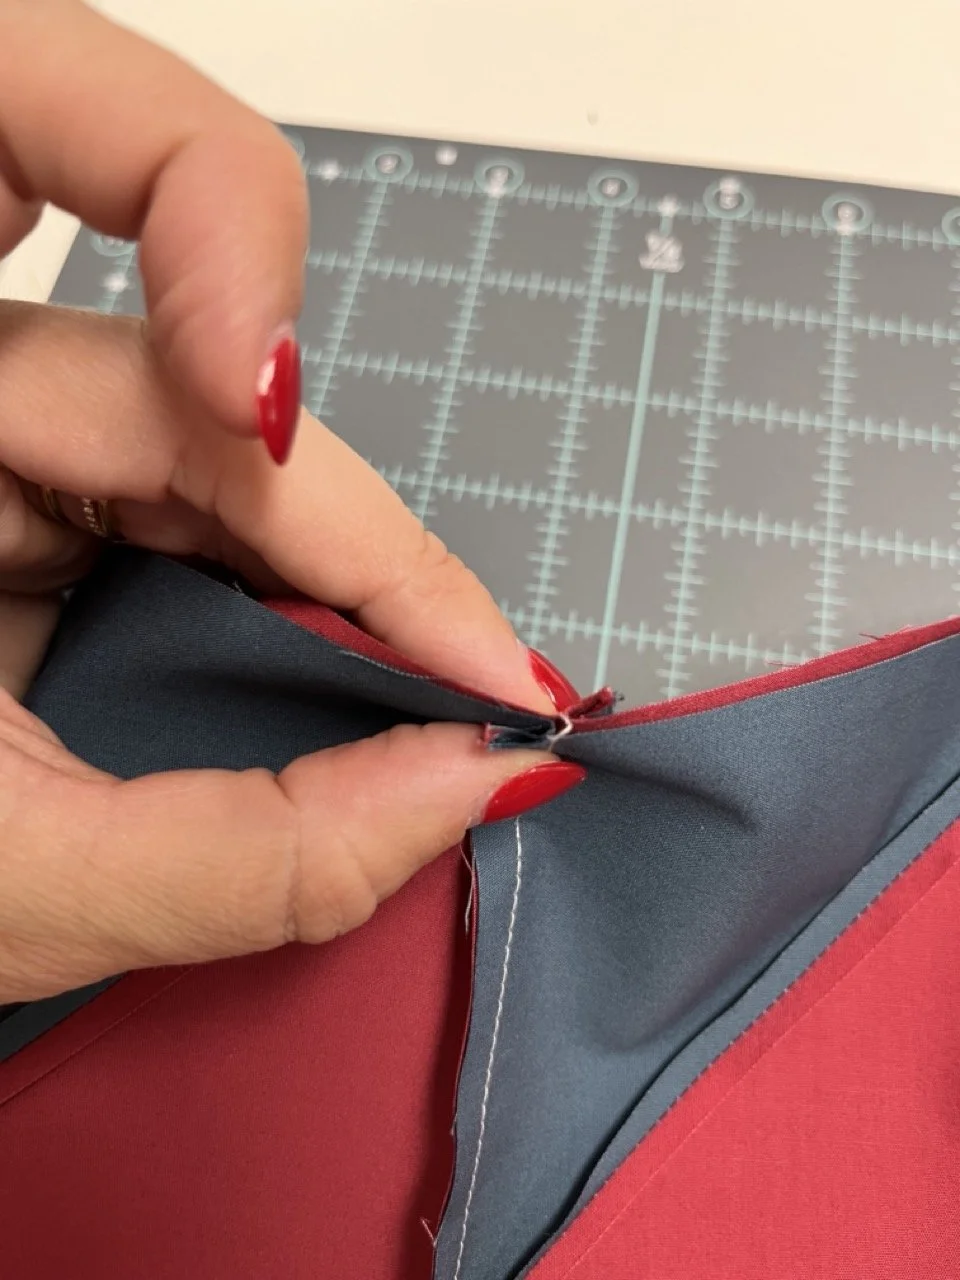
6. Using the wool mat and iron press each seam. Ensure you switch the direction you press to create the nest needed for the next step.
Press to right, then press to the left. Repeat.

A closer look at the seam direction while I pressed.
7. Fold row 1 onto row 2. Nest seams as shown and pin if desired.
Will repeat for all seams.

8. Sew rows together.
Repeat steps 7 and 8 for the second and third rows.

9. TA-DA! Now you have a 9 HST Block!
Repeat as needed for practice, the more you do it the quicker it will become. I promise.

Hello!
I’m Katie the designer and maker behind Zahm Co. Thank you for being here, I hope you find this blog helpful. For blog notifications, subscribe below!
Click the image to learn more about me.
xx